Wednesday 30 November 2011

Reel making tips from comedy writers

I just finished reading a book titled Writing Movies For Fun and Profit.
Its basically a realistic satire into what the film industry is looking for and how to make it as a writer. With that being said a lot of the wisdom's they offer to writers apply to animators.
So in point form here is some blunt food for thought for the young animators or job seekers out there.

1. Studios are only interested in making piles of money, period.

2. If you know what it is you want to do, and know where you want to work, research it. Live close to it. Tailor everything you do to it.

3. Discipline. This is what separates amateurs from professionals. ALWAYS BE ANIMATING. If you want to work in the industry and are presently not, you should feel compelled to animate everyday.
Why do you need to animate everyday?
1) Most of what you do won't be on your reel.
2) You will improve with everything you do.
3) Animating something becomes easier after you have done it once, imagine after 100 times. Seriously, animate a ball once. Time yourself. Save that scene. Do it 50 more times. Time yourself. Only compare the first and the last. I promise you, not only will the last one look better. It will have took you 1/10 the time.
4) You will have things to show a studio if they ask to see any of your work that is not on your reel, and it won't look like crap.
5)You won't still be in love with the shot that no one but you and your mom like, and you will be more inclined to throw it in the garbage and start something better, or you will be more inclined to take feedback and fix it.

4. Observe things everywhere. Life is one giant pose and character library. A good animator observes how ppl around them move, how they behave, how they hold themselves etc... If your not at home animating, you better be observing things that will help your animation.

5. This is the most important thing in this list. Everything you ever animate, ever, needs to be entertaining. If it's not, stop what you are doing, right away. Unless you are learning a principle, or its a school lesson, STOP NOW. Or unless you are entering some odd film competition, that 95 ppl out of 100 would want to punch you and the films watched in the face. STOP. If you don't know what's entertaining, or how to make a shot entertaining, STOP, ask everyone you know to look at your work and what you can do to inject entertainment into it. If you still don't know, STOP, watch every movie you can. If you still don't, STOP, rethink your career. All humans watch t.v, cartoons, movies and play video games with one purpose and only one purpose, TO BE ENTERTAINED.

6. Don't reinvent the wheel. No one wants you to. There are 12 principles of animation. Learn them, use them. If you are getting feedback and are always hearing ppl tell you that you're missing some of the principles. In all honesty, if you haven't mastered those principles stop doing advanced animation, you aren't ready.

7. Don't waste anyone's time(this goes for yourself as well). If you are seeking feedback to build a reel, and aren't applying what people are telling you, they will stop giving you feedback. This sounds harsh, but I've seen it happen many many times.
If your reel is still under construction, you should be devoting the majority of your waking time to it, any other time is wasted time. If you know what you are putting on your reel, you should seek feedback on every shot, until you know how to structure your reel to be as entertaining as possible. Fingers crossed ppl are still willing to help you at this stage.
If you are having someone watch your reel, they don't want to see 5 minutes of average work. We all know after 5 seconds if we want to watch your reel. If we aren't impressed at 10 we stop, if we are bored by 20 you've lost us. Think of it this way, two writers who have made 1.5 billion dollars for a studio only get 10 minutes to pitch a new script. How much time should an animator get to sell their reel?

Tangled art from the Keane family

Hey guys and gals,
Most budding animation enthusiasts have heard of Glen Keane. Not many have seen the beautiful work of his daughter Claire. Well here is a collection of Claire's artwork for the character of Rapunzel, posted together with the artwork from her father. Her use of line and colour are inspirational and in the words of Dapoon, this is ''Gold, gold, gold!!''

While, your visiting the post, please check out the rest of Living Lines Library, run by the talented animator Peter Nagy. The sites hosts lots of character model sheets, pencil tests and concept art, creating a wondeful tribute to the art of traditional animation.

Hope you all enjoy!

Sunday 27 November 2011

MC 19: To spook or not to spook


Hey guys and gals,
This challenge was created to celebrate Halloween on the 31st October. The entries really capture the spirit!
The first entry is created by JKR. I loved the devilish antics of the ghost, that scared the bananas out of poor Fred. It is our first 2d entry in colour!! Second up, is a ghoulish entry by Arnold Balaka, followed by Guilherme Mello Oliveira. Really glad Guilherme's clip cut before the baby started crying.... Last up, and he cheated a bit due to time restraints, is a freakish take by Wolfor. However, warm congratulations, because it really is great animation!

Now to run out of here myself. If you have any thoughts on the work created, please place them in the comments section.

Till next time, happy animating!

Friday 25 November 2011

Tim Allen interview

Hello guys and gals,
Now this next interview is pretty special to me. Sharing some words with us is Tim Allen, a leading stopmotion animator who has worked on many great features including Fantastic Mr Fox, Corpse Bride and Frankenweenie.

My first introduction to Tim's work was during a guest speech at UWE, Bristol. The university's senior lecturer, Chris Webster, had taught Tim many years before at Glamorgan University. They both spoke about the importance of having passion for being a character animator. I didn't quite understand their words at that time, yet somehow, listening to these people sparked a little flame inside of me. Since then, I have always known what I wanted to do as a career. My warm thanks to both.

To the rest of you, I hope you all enjoy the read!

How did you get into stop motion? When you first started animating, was it always your goal to work with puppets, or did your enthusiasm for stop motion come later?
As a kid I was always drawing cartoons & reading comics & I don’t think there was ever much question that I’d do anything other than some sort of artistic profession. Actually I’d never even considered I could do animation as a career until I was haphazardly looking at university courses. I’d committed myself to an art based profession studying a 2 year art BTEC in favour of the more academic A-level route. I didn’t know what to specialise in next & was sitting in the waiting room for the open day of a model making course when someone came in saying “Is anyone here for the animation degree?”. My eyes popped open at the idea I could make cartoons for a living! It sounds cheesy but from that moment I knew exactly what I wanted to do with my life. I visited every animation degree I could find until I saw that Glamorgan uni taught stop motion. That was it - animation with models. I’d found my calling.

With retrospect I think I was very lucky to find a career path that I passionately wanted to follow.

You graduated from Glamorgan College of Art, with a 2:2. To my understanding you struggled at first. Please may you talk about this experience, and what you believe turned your troubles around.
I was hit & miss at the start really. I made some successful work & some that the tutors couldn’t stand. At the humble age of 19 I was sophisticated enough to be highly amused by toilet humour. I crafted a film about a waste disposal system for the distant future, dubbed Toilet 2000. This ingenious device for the next millennium could remove body excretions without any need for unsightly straining from the user. Can you believe my tutors hated the film & at the critique ripped me apart in front of my fellow students. It didn’t help that the film wasn’t completely finished, though perhaps fortunate that it was only the sound effects missing.

I had actually worked incredibly hard on it & felt mortified. It made me utterly dedicated to prove myself on my future projects & create some of the best work in my year group. The story has a happy ending as I won the ‘Glammie’ for best 3rd year film with Kaptain KerPOW. I’m still proud of this if only that it was a personal victory to come back from feeling so shamed. The tutors remain good friends of mine & I’ve taught alongside them many times. One of them does enjoy jokingly reminding me of this fateful day whenever I’m giving a lecture to his students!


(Kaptain KerPOW! is the property of Glamorgan University, Wales)

Can you talk about the work you did once you graduated and how this prepared you for your role upon Corpse Bride.
At the time I left college the stop motion industry was having one of its occasional slumps in work, making jobs very hard to come by. I travelled all round the UK visiting every company I could find doing work experience & whatever I could get. This gave me a good understanding of what was out there but it took a year & a half to land my first animation job. The work was predominately children’s series back then & I’d travel to wherever a project was, in part just to keep employed. I actually loved working for many different companies, practising various techniques. Every time I did something new, I felt I was progressing & it was this feeling of learning new tricks & improving on my understanding of animation that was now my driving force.

I’d been animating professionally for 6 years & think I was becoming quite a flexible worker. At that time Corpse Bride was on the horizon as an upcoming project & seemed an unmissable chance for me to make much higher quality animation. However I sent 3 separate showreels before I even got an audition. By now I was very used to walking into a new studio environment & trying to mimic the animation style, but this was a real test – could I work at that quality level? I think my experience in adapting to new environments was what got me the job. Simply put, I asked the other animators what the director did & didn’t like & focused my audition accordingly. If there’s any key to how I got my first feature film, it’s those years of learning a broad range of approaches to animation on different projects.

What is like working for Tim Burton?
Well Tim’s only ever been lovely to me in the encounters we have & shows a lot of gratitude for the work we do. I don’t get much direct interaction with Tim as there’s an animation director as my main point of contact. He takes what Tim needs from the character & story & guides me on the best way to practically make that work in stop motion. Tim often likes the work to be dynamic & it’s not unusual for him to speed my work up by taking the odd frame out!

I’ve been lucky enough to have several surprise visits when he’s partially happy with a shot & he’s popped in just to tell me personally! You can’t help but feel flattered & a bit stunned! Our last conversation involved whether or not a vampire cat was more powerful than a Frankenstein dog. Guess you’ll have to watch the film to find out...

You worked on a wonderful and complex scene of Lord Barkis, giving a wedding speech that includes a small continuity error. In this shot, a camera tracks down a table of guests, each served a plate of chicken. For the next shot, Tim Burton requests the chicken is replaced to include the gag 'there is an eye in me soup'. The error is most often unnoticed while the gag adds to the entertainment value.
As the animator of the shot, please may you share your thoughts on this change.
Lord Barkis's speech
Ha yes I forgot about that one! The soup joke was thought of either whilst I was doing the big table shot or just after, I forget exactly when. I did point out the continuity issue as soon as I heard about it, but they were already aware & felt the gag made it an acceptable compromise. The wedding speech shot was intended to be gray & dull in its uniformity. The identical chicken meals were intentionally mediocre & unappetising to emphasis the soullessness of this sham wedding. Also my animation of the guests was aimed to be apathetic to the event. It was felt that replacing Finnis’s chicken meal with soup for continuity reasons would spoil the uninspiring symmetry of the table layout. It could even be distracting from the story if the audience start wondering why only one person had a bowl of soup.

All the animators were given a prop from the film as a leaving present on completion of the film. Mine was a little tray complete with cutlery & plate of chicken!

"Mrs Everglot 'There's an eye in me soup'"
You now have the opportunity to work on Frankenweenie. Have you noticed differences in approach to animation style between the two features?
Frankenweenie is a bit snappier in its timing which makes it fun & less painstakingly controlled than Corpse Bride was. Yet I learnt great discipline from subtle movements & acting on Corpse. With Frankenweenie I’m doing much bolder, dynamic spacing, & the emphasis in getting the anatomy & use of weight right has been difficult but educational. It’s great to work with much more experienced animators than myself as I continue learning new approaches to animation. Frankenweenie has also given me the opportunity to work with 4 legged characters a lot!

The clearest change with Frankenweenie is that we have much less preparation time so it’s more hit & miss whether we get the shot exactly as intended. Ironically less preparation time slows the animation down so we work under a lot of pressure to minimise this. We all need to be faster yet get it right first time.

You also worked upon one of my favourite stop motion shorts, Susie Templeton's 'Peter and the Wolf'. I really loved the film for taking its own independent approach to the story. Please talk a bit about your thoughts on the film and your experience working upon it?
I’m very proud to have been a part of this film as not many people outside of Poland were involved in the shoot & it’s certainly a unique project. Suzie Templeton deserves so much credit for the film’s Oscar winning success & it was very tough to keep it as close as possible to her vision. It was actually a very hard film to work on. There were so many complications (time & money to mention but two!) that made it very difficult to give Suzie the shots she wanted.

Animating realistic acting to music was a fun challenge & also it was hard to get so much emotion out of puppets that had virtually no facial movement other than rotatable eyeballs! A big part of the experience was working in Łódź, Poland & soaking up the lifestyle. The Polish model making is simply beautiful & I really rate their attention to detail. Se-ma-For have a very long & interesting 60 year company history & had developed many of their own techniques that I haven’t seen anywhere else in Europe. It was a culture crossover with British production company Breakthru Films blending with mostly Polish workers & this made the experience very interesting for me. There were some inevitable clashes but it also broadened horizons for all. I for one had to learn to drink neat vodka!

Character DesignI’ve since been back for a much longer stint to Łódź. I was animation supervisor on Breakthru film’s last project The Flying Machine directed by Martin Clapp which was an even more ambitious film than Peter & the Wolf. They have been the most gruelling two productions I’ve ever been a part of. It must have been worth it though - I’ve made many friends in Łódź & brought back my Polish girlfriend Monika!

(Please click pic to watch Trailer)

Please tell us about your animation process.
Every production is different, so my answer would be tweaked for each one. To generalise, my role is to make the best of the situation given & try to make the shot work in context with the film. In plain English, this usually means getting the shot started as quickly as possible, & animated to a tight deadline. Of course I must make sure it tells the story & keeps in character. The key is really in the preparation. Once I’m mid shot, most of the time I rely on my instincts. I try to take reference frames as a guide of the key frames to hit. If I’m luck I’ll get a chance to rehearse what does & doesn’t work for the shot. Occasionally for trickier physical shots I’ll do a live action video, commonly called a LAV (videoing myself in real time) to help give me a few practices at getting the anatomy & timing right.

Before tackling a shot, how much time is spent building an understanding with your character and puppet?
Well I’m afraid these days there’s never enough time! It can take many shots before you really understand the dos & don’ts with a character. Normally you are very lucky to get an animation test before using a new puppet. One of the best ways is to talk to animators who’ve had experience with the character to learn from their mistakes & follow what they’ve found successful.

If a directors confident with how you animate a character you may be with that character for most of the film. It’s easier than casting lots of different animators who’d all have a slightly different style. I look at my first shots with a particular puppet & often cringe because I can see how much better I’ve become with it over time.

What do you find most challenging?
Giving the director what they want in the time the producer allows – usually there just isn’t enough time to get it completely right.

Where do you find inspiration and influences?
I like to look at animators work & go through it frame by frame to study how they create certain movements. I often find myself thinking “Wow I wish I’d thought of doing it like that”. It’s great that we all have slightly different working techniques because you can keep learning from others.

If you had to choose any stop motion feature or short that you could have worked on, what film would you choose and why?
Jack Skellington, The Nightmare Before Xmas
The Nightmare Before Christmas. I was an art student when this hit the cinema & I just loved the visual style. I wrote my college essay on it (& got a pretty bad grade!) & it was the film that really made me think “I want to do this!”. Also it was the first of its kind in many ways as a big budget stop motion feature film which made the scale of the project pretty ground breaking. I’ve been lucky enough to work with quite a few of the Nightmare animators. I get a quiet buzz from that & have always enjoyed hearing their stories of life in Halloween Town.

One of the 'limitations' of stop motion is that the physical elements have to stay still long enough to capture them. An obvious challenge to this would be the representation of water. Please talk a bit about how you have previously tackled this?'
Clingfilm used in Fireman Sam
In stop motion we generally accept that we can’t do photo realistic water. If you want that you need to go the (generally more expensive) CG special effect route. But stop mo water can have quite a stylistic charm & can be very convincing. Different types of water use different techniques. For example, raindrops on a window pane or watery/tearful eyes are normally glycerine. A single drop of water for a close up is best represented as melted glass or even hot glue from a glue gun. Water surfaces like puddles or lakes are usually sheets of Perspex upon which other water effects can be animated. Cling film is an easily recognisable stop motion water technique. It’s used for larger bodies of moving water like waterfalls in Fantastic Mr Fox or splashes in Fireman Sam. We wrapped it around wire for ‘tubes’ of water projecting from Fireman Sam’s fire hose. To give clothes a wet look in The Flying Machine I believe latex was painted into the fabric.

The Wind in the Willows director told me that for the ‘Messing about on the river’ sequence, the river itself was large quantities of wallpaper paste that the boat could sink into slightly but remained on the surface very convincingly. It released a toxic smell that filled the studio & would never get passed health & safety by today’s standards! Another stop motion favourite is KY jelly. It’s great for sweat running down a puppets face or animated droplets of water running over a surface. A traditional gag is to send a rookie runner out to buy 12 tubes of KY & see them return to the studio somewhat red faced!


( Tim's Fireman Sam water shot can be seen in his 2009 showreel)

Are there any exercises you can suggest to work on to prepare for character animation in stop motion?
Almost all animation should be considered ‘character animation’ as you need to believe that an inanimate object is ‘alive’! There’s a lot of tried & tested teaching techniques that I think make good building blocks for character work. Many animation courses use these techniques in a similar structure for a good reason - it generally works. For more novice students I’ve found it useful to separate performance into individual elements like simplistic lip sync, full facial lip sync & body mime language. Once students are getting to grips with each part it’s easier to put it together into a complete performance piece. That’s pretty standard practice though. I’d also suggest filming yourself or others a few times to get a range of ideas for how to approach the performance.

I do notice that there’s rarely animation classes focused purely on the eyes. These are the most important communication tool & there are so many tricks & tips in this vital area. I’ve given a few classes purely on eyes & found myself stunned at how many dos & don’ts there are. Even on Frankenweenie I’ve been learning new tricks to avoid being cross-eyed. The Tim Burton character designs are very prone to it & I still find it so easy to get the eyes looking in the wrong place.

A major problem stop motion students face is inexperience in how to make controllable puppets. How can you learn to animate a character if the puppet keeps falling down or the head is too heavy for the neck? When I teach I spend more time fixing puppets than going through animation techniques. This is a hard issue to solve as both puppet making & animation take lots of practice to learn & courses don’t have enough time available in the syllabus. I’d suggest buying a cheap armature for a start. If you use plasticine faces then mixing bees wax with the eye lids & eyebrows helps them maintain a firm edge & avoid going gloopy under the hot lights. There are so many more tricks like this, you need to pick it up one step at a time...

In your career to date, you have already enjoyed great success. Looking back at when you started animating, what advice would the Tim Allen of 2011 give to the Tim Allen of 1998?
Keep seeking to learn new techniques & improve. Try things outside of your comfort zone. Get out there, meet people in the industry & get to know their previous work. On a very practical note, when you’re earning, save for the quiet patches. Above all else, don’t forget to enjoy it – you bring dolls to life for a living!

Upon leaving this interview, I wish to leave you all with a glimpse at Tim Allen's 2011 showreel. Hope you all enjoy! If you have any thoughts on Tim's work, please share them in the comments section of this post. Thank you.


Interview by Steven Hawthorne

Wednesday 23 November 2011

Pose Book


"Pose Book" is a great app I found via the Bancroft brothers that was developed by Stephen Silver. It is sadly available only on ipad, ipod touch and iphone so I can not try it out on my Android until it is available in the lion app store. I know that if Tony suggests it it is worth it. From the video on the site explaining the I am amazed at how in depth this is. If you get a chance to get it I'd love to hear your thoughts as well.

If you are not on ipods or ipads we have posted similar sites as well in these posts.


Monday 21 November 2011

MC 21: The Pendulum

I had a body mechanics piece planned for this challenge, but its on hold till after xmas. Instead, this fortnight's challenge is written by Cosmicfool. Hoping it helps people who maybe struggling to find a good way to build a pendulum. Those who are familiar with this exercise, may have the freedom to be creative.
Hope you all enjoy!
Hey, this is another back to the basics challenge. As I was preparing this pendulum exercise, and talking to other animators. I was shocked to discover almost everyone I talked with had never done one before. You all know who you are. Now is your time to do one. Perhaps you'll learn a thing or two.

So the idea behind this challenge, is to take the pendulum and move it across the screen however you decide. Have each piece underneath it follow through, drag, and swing accordingly. You will be amazed at how many different ways you can do this, and how many ways this can apply to your animation! When we were brainstorming different things it could be, the list went on and on. A man on a zip line. A person carrying a bag of groceries. In harmony with last challenge it could be a man swinging on those rope things at a circus.Use your own imagination and think of ways you can apply this animation to really spice it up. I can promise all who participate will benefit in their animation from this one.So for those of you that are just learning animation, here's a loose step by step guide that I took to make this example piece. Hope it helps you out.

Step 1: Establishing your timing, and moving the board from point a to b.
Here I will show you how to use a timing chart to build a base for your pendulum. I have gone on to make changes afterwards, but it will give you a good result and a nice foundation to build upon.


So working in the front view, I'm going to move the board in translate x from a to b. First thing I do is I plan out my timing. I need an anticipation. I need to move across the screen. I need to ease in and to ease out of my movement.
  • To start, I set a key on frame 1.
  • I don't want my animation to start moving yet, I wish to allow the eye has a chance to see the screen. Therefore, I start my animation on frame 9.
  • I have a 7 frame anticipation to frame 16.
  • I have decided it will take twenty five frames to move across the screen, finishing at frame 41.
So as it sits, I have a key on 1, the same key on 9, my anticipation extreme on 16, my moving extreme on 41. I now need to really refine this movement, so I get a nice feel. To do this all my curves are in linear.

Placing first few keys: Click to enlarge
Timing chart
What I'm now going to work on is my spacing. To control my anticipation I added a key on frame 9 and basically pulled it up a bit, so I didn't move to fast when my movement starts. I found that was enough to give my anticipation a good feel.For my forward movement I used a timing chart that I'll show and explain.
Now the forward movement begins at frame 16. But for now, let's imagine it had started at frame 1. Here's the chart:
     
                          1--9--11--12--13--14--15--17--25

So here's how you read this chart:
(please note, 1 in this case represents Frame 16 on our pendulum)

1 is our point of origin.  Frame 13 is our middle point. Frame 25 is our end point.

We need to separate the animation into two halves. We want to focus on getting from frame 1 to 13. We shall call this Part A. Part B will be from frame 13 to 25

Part A
Frame number:                             1   --      9     --  11    --    12    --   13   
Percentage from frame 1 to 13:     0%       25%     50%       75%      100%

Part B
Frame number:                             13   --   14    --  15    --   17    --    25   
Percentage from frame 13 to 25:   0%       25%     50%       75%      100%

So if you are looking at this you will think, 1-11 and 15-25 frames only accounts for 50% of the entire movement. Yup. They are creating my ease ins and outs. 9-11 is my acceleration. 15-17 is my starting to slow down

Now here's how I implement this chart using the graph editor (you could use the dope sheet also, but I like using the graph editor as I can polish my curves while I'm here).
  • Basically 1 is when I start moving forward from my anticipation. 25 is when I reach my end point.
  • At frame 13 I am half way through. If I was in linear, at frame 13 I would be half way through my movement. So I key frame 13. Up till this point I just had a key on 1 and 25.
  • Now I key frame 7 and 4. I know frame 7 is halfway from 1 and 13. Based on my chart, I want this key at 11.
  • I keyed 4 as well which I knew was the quarter way point. Based on my chart I wanted this key on frame 9.
  • So now the first half is correct. I than did the same on the back half of the movement. Frame 19 I moved to 15, and frame 22 I moved to 17. 

Graph of timing chart
Once the timing chart has been transferred to the graph editor, it should look like the pic. Next, I merely polished up my handles. I also noticed I ended a bit faster then I wanted to, so I moved my last key over about 7 frames, to have a really subtle slow stop.

Step 2: Rotations 


I needed a rotation on the big board to sell the anticipation. I needed one to show I was going to accelerate. I needed one to show I was going to stop.

I also needed a couple little subtle rotations at the end, to show the movement was coming to a halt. If you ever watch a car come to a stop at a light, you'll notice the body comes up and then down. The harder the stop, the bigger the recoil.

So heres I how I worked it all out: My body starts coming backwards at 9. So I decided to start the rotations at 10. My body starts accelerating at frame 16, so I figured to have the backwards rotation stop at 17, just so they didnt all settle same time. My biggest movements in forward progression was 26-30 so I decided to have it come its extreme at 31. At frame 35 my movement was starting its biggest slow down, so I decided to have its next extreme to show it was stopping hit at that frame. Then I just threw in a few keys to sell the stopping motion.

Platform graph: Click to enlarge

There really wasnt much to my breakdowns here, you can see in the graph the only ones of significance were when the board starts really accelerating, I just wanted to have it almost hit its extreme before the fast movement started, and than to slow into its big extreme. You'll see a few keys outside of that, but they are merely to prevent the board from being straight.Usually if I'm going to be passing the 0 point in rotations, to avoid things being straight and boring, I'll add a key before and after it, just so there is no boring pose in the movement.

Step 3: Now the fun part. Animating all those little guys underneath

So here's the fun part. This is where you really have a lot of room to play. How heavy do you want the chain to be? You can really start playing with the shapes you want that chain to make. If you look at my clip, my major poses were on frame 16, 24, 26, 36, and 41. The rest was just causing it to settle.

Frame 16
Frame 24
For frame 16, that was when my board hit its anticipation extreme. I wanted this pose to show that chain had some weight, so whatever it was pulling was resisting the momentum of the board. What was important here, was to get this pose, but not have the bottom of the chain pop. If that bottom of the ball rotates forward from its sitting pose, I have made a mistake.
Frame 24, I was still trying to maintain that same shape as 16, but show the momentum of the board going backward had started to effect that bottom chain.

Frame 26
Frame 36
Frame 26 is my reversal, and at this point, the board and momentum is winning, and that chain is gonna start following it. 36, is when that upper board really shows its slammed on the breaks, so I wanted to hit my biggest extreme here of the momentum of that chain coming through here. 

Frame 41
Frame 41 is when that upper joint hits its first extreme of settling. So I really wanted that bottom joint to be at a nice contrast to it, and hold it back to show it was gonna get whipped by that upper joint that was being whipped by the board above it.


Basically the rest is just settling that weight. Here is the final graph and animation of my pendulum.


Final graph editor for translates and rotations


Its only a simple pendulum, but I hope it gives you something to build upon. Be creative and see what you can come up with. Good luck and happy animating!


Again the animation could be anywhere between 75-125 frames. If you have any questions about submission requirements, please check How-to-participate section for more details.

Sunday 20 November 2011

Building a character performance

Hey guys and gals,
The illusion of life is a magic trick. Used successfully, it can pull the wool over the eyes of an audience and fool them into believing that your character is alive and thinking. Building a consistant performance can sometimes mean the need for clear rules about who your character is or isn't. There may be a time when you have the funniest gag, but if used on a particular character, can break all believabity.

Character Design Over on the Temple of Seven Golden Camels, Mark Kennedy discusses this topic indepth, using examples from some of our favourite features including ''Rapunzel'' and ''Lady and the Tramp''.

Please click the pic to have a read!

Making this idea simplier, Jean-Denis Haas has created a nice post on Spungella about structuring the order of a character's thought process. Keeping his advice in mind may help build a more natural performance.

I wish to leave you with this great example from Team Fortress. Its a powerful introduction to a character. By remaining calm, smooth and collective while being attacked by surrounding gunmen presents the Engineer as much more deadly than his appearance portrays.

To watch, please click on the pic. Enjoy!

Character Design

Wednesday 16 November 2011

Inspiring collection of artists

I stumbled across this rather nice collection of artists work. Great for reference if you're looking at different styles for your animation or even if you just want to look at some amazing drawing.

One of the animation principles being 'appeal' (I forget which one exactly) I'm sure you'll agree with me when I say it is one of the most important principles. Unfortunately some animators treat it as a side note, or something to-do-later. It can make or break a piece of animation if that audience just doen't connect or relate. The beauty is, when your characters are appealing, the viewer will be captivated.

I hope you find this resource useful. There are a few new ones that I'd not seen before and also some of my favourate animated films/series in there too.

Click the picture or link above to check it out.

Tuesday 15 November 2011

Will Sharkey Interview

Character DesignHello guys and gals,
Will Sharkey won our 11SC competition in September, presenting a sorrowful confession of a priest who loses faith in his religion. It was wonderful entry, consisting of a deep performance, some great prop interaction and a creative render.
Here on the 11SC blog, Will takes some time to share some words.

To watch Will's beautiful entry, please click the pic. Many thanks to Will and I hope you all enjoy the read!

Tell me about your career so far in the animation industry. 
After I finished college, I was offered a job in an architectural visualisation company, interpreting tech drawing in 3D for proposed building designs. I was delighted to be doing something remotely connected to my degree but after working with the company for a month, I was slightly underwhelmed with the position as it didn't offer much diversity.

Piranha Bar, Ireland
Two months and a few emails later, I joined Piranha Bar, a post production company in Ireland. When I first saw the caliber of work they were doing, I was excited if not slightly terrified to be offered an intern placement in commercials.
I always hated when people told me that the jobs you want are down to luck and timing, but it was true in this case, maybe with a little added persistence on my part. I've been working in Piranha Bar for 5 years and it's a really great place to work, because, as a company, we pride ourselves on the more creative appoaches to a project.

From intern I was trained in Softimage as a 3D generalist but I'm starting to find my niche in character animation and animation in general.

Do you have an N-Zone / a goal you would hopefully like to have achieved in ten years time?
I've actually thought about it! Two years ago I couldn't animate a character, I had no control over a performance. Nowadays im starting to come to terms with character animation a little more. Having worked as a 3D generalist, I love so many aspects of the medium from texturing to lighting and rendering but animation is really the one thing I consistently get excited about when brainstorming an approach to a new scene or project. In ten years, I'll be still learning and practicing animation, hopefully on bigger more demanding projects.

You studied 'Model-Making and effects for films' at art college, a place that taught you design, physical props/mechanisms, sculpting, stop-motion character and set construction. Many students attend similar great courses which introduce general film aspects, yet do not focus on traditional animation principles.  
What advice would you give to somebody attending a similar path to becoming a character animator?
The course I attended tried to cover as many aspects of film and film making as it could, but due its wide scope, I often felt that I had only scratched the surface of a topic before we moved on to the next. Animation and it's principles were mentioned but there was little importance placed due to the time restraints. It wasnt until I was employed as a 3D generlist that I realised the importance of researching animation principles when approaching any project.

In animation, you always hear that there are no rules - this is true, but there are so many scenarios which have been discussed, tried and tested. For example a bouncing ball and its distribution of volume implyng weight as it hits a surface. These are set theories that are constantly translated well when applied to any performance. It's always quicker to learn something when a trained individual is teaching you but nowadays, there are so many resources available in the form of books and online tutorials.

Richard William's 'Animator's Survival Kit' was my first stop. If you just buy that book and repeat what is documented, you will improve dramatically. I often repeated chapters a number of times as, half way down the line on the first approach, I realised that I've made a critical error and just started again. Honestly, that book taught me animation, something tells me im not alone there!

Being a self taught animator, did you have your own structure of lessons for how to go about learning?
I've been working in Piranha bar for 5 years, but I believe it only been two years that I've really been animating. After working on a difficult animation job, although the it turned out fine, I felt I had little control over the characters. So I went out and bought Richard Williams' book. I was sick of that slight question I had in the back of my mind prior to a job; of whether I could animate the performance that I was being briefed on.

Box Jump
Firstly, I looked at the lessons online courses like Animation Mentor were giving their introductory students. I started out with a sphere with legs walking, all the time with a book open nearby. It really is just building blocks and practice. After I had attemped some walk cycles with a full rig, I approached 'jumping on a box'; after that running. It was a mixture of looking at students work, analysing the lesson structure and practicing all steps with an eye on a few books.

My goal was to be able submit a competent 11 seconds club performance. With that in mind, I started attempting small scenes eg 'opening a door', as I found that working with exercises are a great step; working in a scene has its own set of limitations and challenges, of which you can learn an awful lot.

You are the 11 Second Club's first winner using AnimSchool's Malcolm rig. Please talk a bit about your experience handling the rig.
When I set out to practice animation, I did some searching around on the internet for Softimage character rigs. I have rigged characters before but I am by no means a rigger, that would be time I'd prefer to spend animating. There were a limited number available for the community and though they were well constructed, most lacked any kind of facial controls; facial animation being something that I was leading myself up to. I was lucky enough to beta test an early build of Malcolm.

The beta rig was solid and easily the most complex rig I'd ever worked with. It took a few hours to get conformable with the rig, identifying the core controllers working through the synoptic, but the range of motion and control you can quickly achieve made me appreciate the sheer hours invested. It's really fast considering the detail and the character is a lot of fun to work with.

You entered the competition a month previous. After landing the 31st place, do you believe anything changed when you first approached your September entry?
As I was so eager to enter the competition and I'd say I just plunged into animation and worried about the story after. In a way I didn't want to waste my time with a story and just wanted to get animating but I realised after, without some backstory, there is really no reason to care about a performance.

I had a guy and a poorly framed bear, there was no introduction to the scene, it was just an explosion of animation without any pacing. I'd also say my choice of camera angle poor, the shot was too wide to spot the small detail of the bear, and it was something you only noticed at the end.


From a more technical perspective, I realised I'd have a much easier time with hand arcs if I had stuck with IK for such movements, instead of switching between that and FK. For such a snappy piece of animation, your arcs have to be spot on, or else the animation will strobe.... and my animation strobed.

Also, in my reference of the clip, my animation of the character warming up matched my final animation. A lot of people pointed out that there was too much happening in the beginning, especially in the 'warm up' moment. The winner of that month - Pairatch Lertkajornwong, has a similar idea of warm up, but it was well paced and you could feel the beats he hit as his characters ajusted with the movements. I learned that even though something is in your animation reference, it may not translate well with the same timing to your animation. You have to be ruthless, cut out what doesn't need to be there and not try to fit too much in.

Talk about your animation process.
For September's entry I spent a good while thinking the line over during my day. I usually try and shoot down my first idea, because for me, it is usually the more obvious solution. Once I have an idea, I listen to the track several times, trying to find any kind of moments or anchors - benchmarks in the audio that hinge action.

When you film yourself, you start to see little nuances appear, slight gestures that you wouldn't normally consider but really elevate a performance. At the dialogue moment when the Priest says 'never', I made an offset gesture with my left and right hands, it was something that naturally happened. In the eCritique Kenny Roys spoke about using a 'head shake' there, but again, that was my first instinct so I tried something different. Next I quickly sketched over the footage in photoshop, making notes, mainly mechanical observations that I should be wary of.

Using the reference, I blocked out some rough poses, I never worry about the audio at this point, I'm just trying to find some nice poses that tells the story.


(Will's rough blocking)

After, I slip the poses along the timeline in sync with the audio. Blocking is my favourite part and I normally try and block for as long as I can before inbetweens, it's just easier to re-time at this stage. With blocking in place, I spline and keep refining. Once the lip sync is in, I make any final adjustment to poses and add in some secondary animation - to the hair etc.

Where do you find inspiration as an animator? Or inspiration outside of animation? 
Pocoyo
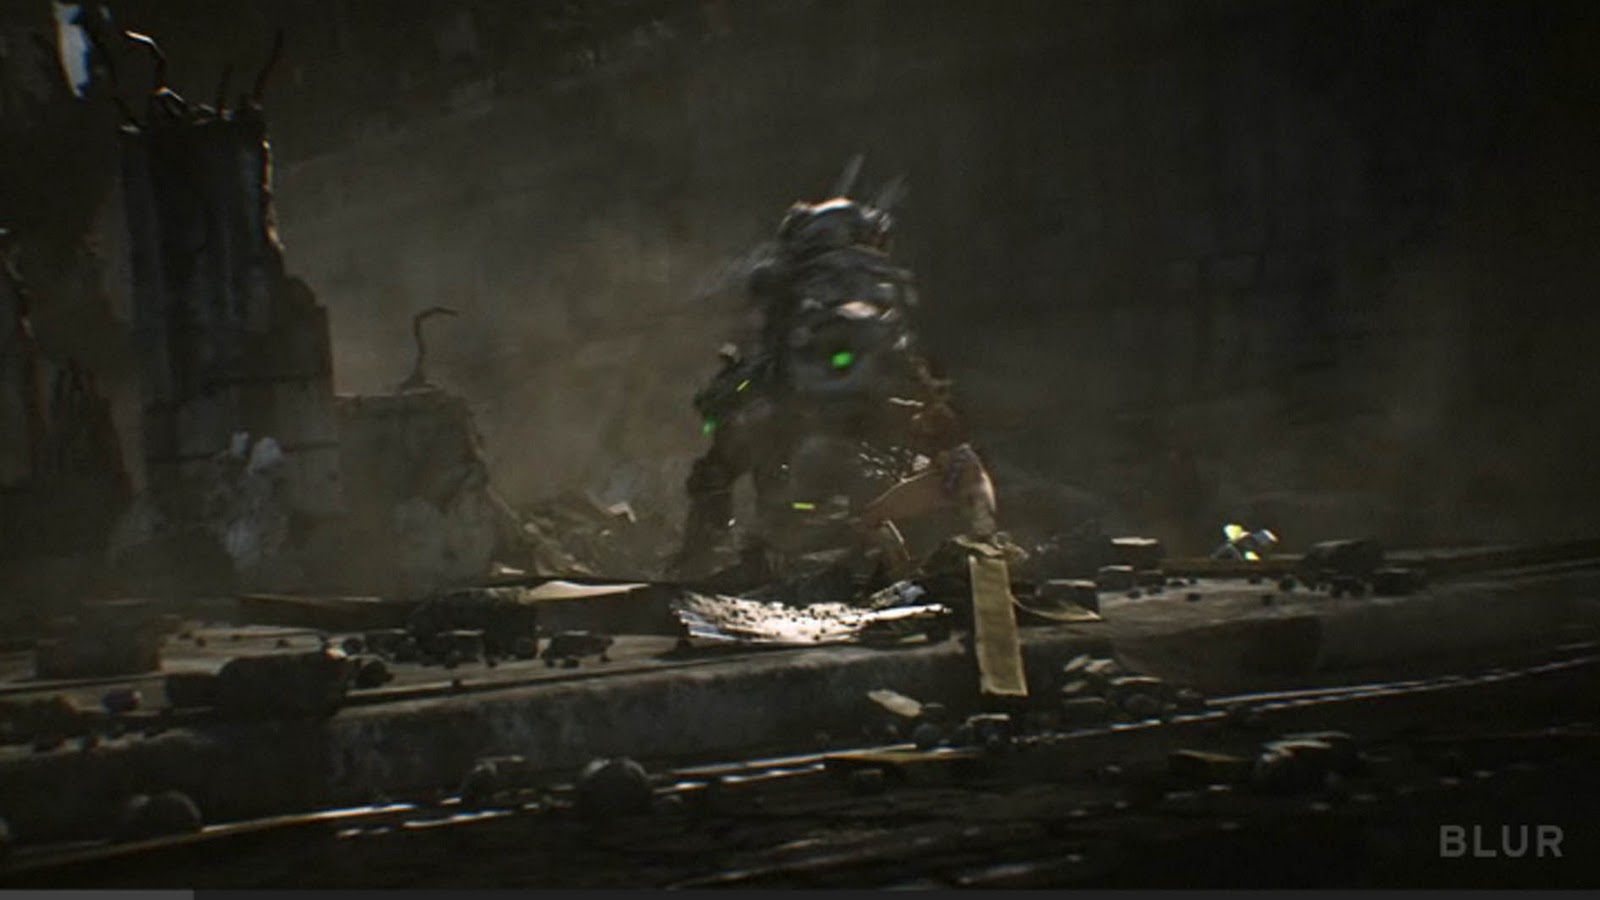
Actually, aside from animated films, I draw alot of inspiration from game cinematics. Studios like Blur and Blizzard create some of the best performaces I've ever seen, the standard is staggering. Working in commericals, deadlines are always tight but I've found that kids TV programmes achieve wonderful character results that are full of life with just clever stylistic animation. I find myself referencing 'Pocoyo' an awful lot as the characters do some ridiculous things but it always seems to work. Meindbender also did some work for Nickelodeon which is just amazing and highly technical for such a simple character.

Inspiration outside animation is a difficult one to answer, as you can stumble across ideas from anything. For me, it's not something to be sought out.

How did you create the backstory for this piece?
I heard in the audio an individual speaking about the lack of finality in parenting, except for maybe through death - a subject which had been subconsciously playing on his mind. It was a line spoken by someone who lacked the courage or will to speak out before, but had reached a point where he could no longer be silent. The line out of context could apply to many scenarios. My initial tought was a war-torn environment, a sniper in a bell tower but I didn't want a story illustrated by guns or rubble.

Instead I hoped to sell a performance of a character through internal discomfort - leading me to the idea of a priest struggling to come to terms to what he has devoted his life for. It was an idea that allowed the character a lot of introspection and thought; something of which I really wanted to animate. I chose a confession booth for the scene setting, as i loved the paradox of a priest reversing roles and actually being the one confessing.

A crucifix is a powerful symbol of faith. I really like how you have used it as a key prop to tell the story. Talk the thought-process that goes into animating something like that.
I felt the character needed a prop of some kind as he was going to be doing a lot of staring, and I needed somewhere to focus his energy. It was also a method of illustrating to the audience the subject matter of his thoughts. I've found that props can really sell a performance, they are like little characters themselves that other characters can play off to heighten overall performance.

I used a lighter as a makeshift crucifix, filmed myself a few times and found that I toyed with the lighter from hand to hand, almost as a sign of uncertainty. In another take, I threw it or 'spiked' the lighter towards the table.The 'spike' moment was an attempt at a definitive gesture of frustration, a defining moment for the character for how he had devoted his life and the sheer conceptual absurdity of the subject matter.

Within your shot you make six camera changes, which is a large number for the 11 second club. Some are really powerful and add superbly to the story. Please talk a bit about your motives behind some of the compositions.
Isolated behind wire mess
The main thing I wanted to do was mix up the shots. I researched films that had confession box scenes, in an attempt to see how people have solved the problem of filming in such a confined space. Quick cuts were used so that the audience never got comfortable in one camera angle, which I hoped would echo the character's discomfort. When I shot through the wire mesh, I wanted to illustrate the confinded isolation that the character had found himself in; I was delighted to see that Kenny Roy's eCritique had picked up on that.

You have already commented on the fifth cut being the least successful. Have you any thoughts about how you may have approached it differently?
I'm really on the fence about the fifth shot. In the final shot, the camera leaves before the character and then the character departs; catching up with the camera - as if both are in agreement. As every other shot is locked off, I felt I needed to pre-empt this with a slight move in the fifth shot. If I were to lose the fifth shot, shot four and shot six are too similar angle cut well together, so I'd combine those scenes. I'd have to redistribute my camera timing throughtout the animation, cutting time off the final shot and possibly adding it to the first shot.

In my first 11 sec entry, I feel I did too much with the character, in September's entry, maybe I did too much with the camera. I'll get it right next time!

What was your initial reaction to the eCritique?
Kenny Roy's eCritique
Kenny Roy's eCritique was amazing, thirty minutes of working through the animation really helped clear up a few things for when approaching similar situation again. As I never been trained in animation, it a difficult thing to animate something and then know where to take your animation or even what aspect really needs to be improved. Kenny spoke a lot about acting choices which this is something I've been working on, so it was great to be pointed in clear direction with some solid feedback.
 
Community members have commented on your superb use of lighting. I am a big fan of these type of skills and believe that, when used appropriately, it can really help the appeal of the story. Please talk a bit about your creative thoughts when lighting this shot. 
It got to a stage with the animation that I wasnt sure what to change or what needed more time, so I knew it was time to light, render and move on. The lighting itself took no time at all, I usually setup a general look for the whole scene, then break the scene into shots in order to light individually.

I searched for images of confession boxes and referenced them for the final look. I had three lights, one for the shadow of the wire mesh across the characters face and resulting shadow on the back wall, a light next door, and a fill light, so the scene didnt turn out too dark.

On the two shots in the opposite room to the character, I just made sure that the light wasnt burning out the wall and kept the characters room dark to add contrast - then added some depth of field as I felt the near wall was bright and a little bit flat. I feel its essiental to light your finished animation, it doesnt have to be dramatic, just an even setup that casts shadows, as those shadows really emphasis your contacts.

Is there anything you'd like to add about your thought-process or experience in September's competition?
It was difficult to juggle work and animation but I had loads of fun. It really worth entering the 11 Second Club as I had wanted to for a long time and I've learned a lot from doing so. Im going to keep in mind some of the pointers from the eCritique and apply them to my next work.

Interview by Steven Hawthorne

Monday 14 November 2011

The magic within animation

Hello blog readers!
Welcome to the first post by me, Stina Boberg, an animator-to-be currently studying in Sweden. This post will be dedicated to my view on animation, coming from a very active music background. I have played classical piano and upright bass for over 15 years (participating in more orchestras, bands and ensembles than I dare count).

I like to compare classical music and animation. There are many similarities, such as the ambition to tell a story and inviting the audience to an experience they will hopefully never forget. There are also many differences, 3 minutes of magic on a piano takes maybe a year to animate... it's hard to keep the feeling of magic up when you're staring at the same 4 seconds of animation for a week.

Recently I've been pondering exactly that. How do you keep the feeling of magic in your animation? Is there anything music can teach us about magic? I think there are some things to learn, but before I continue I would like for you to watch this TedTalk (01:17-03:20 is the part I'll discuss below) (although you should totally watch the whole video)


I consider myself to be around the 8-year level somewhere. I know my tools and my basic principles (although still learning), I can create solid animation. But I'm nowhere near the stage of the 11-year old. Somewhere in the mess of tracking arcs, fixing the spacing, double-checking silhouettes, the pure magic that is supposed to mesmerize the audience is just... forgotten.

And that's not very surprising. Animation sometimes seem to be all about the details and not so much about how it works in general. What does Benjamin Zander say about music and magic? Reduce the impulses. Feel how the melody travels, sometimes far away, sometimes home.

I want to think of animation like that. I want to reduce the impulses to the bare minimum required to tell the story. The poses should feel like they belong together and tell the story of one single character. The day I can confidently do that, is the day I think I will find the magic within the animation.

You should of course aim for clear story-telling poses in your animation, there's a reason why Disney has been so successful. But if you're just going pose-by-pose, making each one fit to the dialogue with no consideration of personality or state of mind, it's gonna look a lot like the 7-year old's piano playing. Or maybe like this:


Live long and prosper,
Stina Boberg

Sunday 13 November 2011

John Lasseter: Do not forget to Study the Basics!

Hey guys and gals,
The temptation to jump straight into creating character animation can be very appealling. However, many animators can become disillusioned and neglect the need to study the basics. John Lasseter's video on the youtube channel for DisneyPixar, maybe created two years ago, but its message is just as relevant today as it was when the nine old men began their studies.
Enjoy!

Saturday 12 November 2011

Fighting game character, story and animation

Hello guys and gals,
In this post, I wish to show you all some gaming content as a way to open up a different way of looking at pantomime and body mechanic exercises.

Mortal Kombat
Mortal Kombat Fatali
Being born in the 80's, I had the wonderful opportunity to experience the release and growth of Street Fighter, Mortal Kombat and a bit later, Tekken. I just loved the characters! I had several gaming magazines, where I spend time drawing the characters from each of the series and even included them in a comic book story for my secondary school ''Religious Education'' homework.
Each character has their own way of moving and fighting, which has been determined by their unique backstory and personality. Please note, this link includes adult content of blood and gore, but I hope to highlight Mortal Kombat's variety of Fatalities as a creative display of cinematograpy and character.

Darkstalkers
Darkstalker's
Next, I wish to mention a recently on the 11SC site. Chocobilly posted a link to Richmond Chaisiri's blog, Art-Eater, where he discusses the animation principles used in Capcom's 1994 title, Darkstalkers. Again, great creativity that is unique to each character. The game is admittedly new to myself, but looks gorgeous!

Please click here to view Richard's post

To finish, I wish to link to a shortfilm produced by Blu Studios for the DC Comics. It presents a selection of well loved superhereos and villians, fighting for the saviour of mankind. The body mechanics are executed superbly and are so fitting to the story. Beautiful stuff, hope you enjoy!

Please click the pic to watch. Thank you!

Character Design


Friday 11 November 2011

Pixar Library


I stumbled on the  Pixar Library this afternoon and had to share. It is a great resource of research style papers explaining how to make everything work together. Among them is one that explains the collision system they built in order to have realistic grabbing of objects without dealing with the problem of penetration. The newest one is talking about a new multi touch system (common on cell phones and tablets now) that will aid in the setting of scenes. This isn't the typical "tips or tricks" we normally post but interesting stuff sometime deserves a look and this is well worth the read. 

Monday 7 November 2011

Mc 20: The Circus

Hey guys and gals,
Number 20!! Whoop! Now lets celebrate and have some fun!

This challenge is based upon the circus. There are many, many possibilities it could be really interesting to see what is produced. It could be a clown, an acrobat, a ring master, a lion tamer... just open your mind and enjoy!

Character Design To get you in the mood, I wish to share a link to Disney's 1937 short, ''Mickey's Circus''. I love when the little seal swallows the fish, yet still innocently looks around for it. Such character and so cute!

Please click on the pic to watch.

Again the animation could be aware between 75-125 frames. If you have any questions about submission requirements, please check How-to-participate section for more details.

Sunday 6 November 2011

'Jurassic Park' & 'The Hobbit' links

Hey guys and gals,
A while ago, I spotted a great post on Spungella and have meaning to mention it here since. It linked to Movies.com which collected together some shortfilms, that showcase some beautiful stopmotion. Spungella recommends checking out the Stop-Motion Animated T-Rex Scene From 'Jurassic Park', but I'd also advise checking out ''Prehistoric Beast'', a magestic film that is hard to imagine was shot in Phil Tippets garage!

Character Design

The Hobbit video blog
I also wish to share a link with you which isn't specifically character animation. Peter Jackson is currently in production of JRR Tolkien's ''The Hobbit''. A video blog has been recorded which showcases new ideas for 3D film production, which include concept art made to be studied with 3D glasses.

I hope you enjoy!