"You have to learn the rules before you know how to break them."
I used to hear that line all the time from instructors and co-workers. I never really understood what they meant. Rules are rules and they're there to keep us in line and make our animation look fantastic, right? Right. Mostly. It turns out that there are times when it's okay break the rules; but even then, there are guidelines to help our animation looking sharp.
As animators, we pay a lot of attention to the silhouette of our poses. We want our poses to read clearly, even if the entire character were shaded in with solid black. The character's attitude should still be easy to read from the angle of their head to the individual joints on each of their fingers.
And sure, having a great silhouette is something we should all strive for. But sometimes it's just not practical to have the arms and hands clearly extended from the body. Sometimes the head needs to be tilted down so far that you can’t tell its position in relation to the neck and the rest of the torso, or the hands are placed in front of the body making the silhouette of the fingers disappear. What do you do in these situations?
Why, you rely on the internal silhouette.
Have a look at this pose of Sylvester the Cat.
It’s pretty clear to us that he’s being all sneaky, sly, and mischievous. He probably has evil intentions for that egg he’s cradling away from its nest so gingerly.
But Sylvester’s silhouette is really muddled together. Check out what happens if we apply the old fill-in-the-silhouette-with-black test:
We can’t even tell which direction he’s facing, let alone what his pose is meant to communicate! Still, this pose reads clearly, and here’s why: The internal silhouette is clear.
See, the idea of a silhouette is really about contrasting colors. When we shade a character in with black, we're merely contrasting the character’s shape with the background. Black on white, see?
But if the character design itself uses contrasting colors (Sylvester is a black cat, but his body is white, his cheeks are white, and his hands are white) we can take advantage of that design and get a second level of contrast.
Don’t believe me? Check it out. Here’s that same silhouette, but this time we’ve shaded in all of Sylvester’s white parts to see their shape as well.
Much clearer now, isn’t it? Sylvester's black and white body parts help create a very readable internal silhouette.
That’s one of the reasons the character is designed the way it is. As someone once explained to me: “Why do you think all of those 1920’s and 1930’s cartoon characters wore white gloves?? It was so you could see their hands when they brought them in front of their black bodies!!”
It’s absolutely true. You can even see it in live action. Here’s a shot from American Psycho:
This character’s attitude seems very clear to me. In control, and maybe a bit pompous about it. But here’s the blob of a silhouette we get when we shade him in:
How do we figure out what to make of this big black nothing? Have a look at how the skin tones contrast against everything else:
Now it’s as clear as day!
An even better example can be seen here, in this shot of Jack Lemmon in The Apartment:
Look at how constricted and balled up he is! Is there any way that we could tell what he’s doing just from his basic shape? Nope!
So how do we figure out what’s going on here? Internal Silhouette to the rescue!
Incidentally, if you think that there aren't conscious choices on the part of a director, cinematographer, costume designer, make-up artist, etc. that enhance all of these elements, think again. In a well-crafted film every crew member is paying attention to all of these details to create a frame of film that tells the story in the clearest way possible. Have a look at some of your favorite films and dissect what makes each scene come to life, and then consider all of the people involved in creating that scene. It's a pretty spectacular thing.
*ahem*
Let’s get back to animation.
When we talk about Silhouette, we are mostly talking about a character’s main body pose. We're looking at the spine (the line of action), the head, the legs and feet.
Internal silhouette, it seems to me, often has a lot more to do with hands and smaller gestures.
Check out this pose from the classic “One Froggy Evening”:
The hand is so important to the composition of that shot, it’s not only huge, but it’s bright yellow! You don’t even see anything else close to yellow in that shot. Talk about contrast! The hand practically has its own silhouette apart from the rest of the man’s body.
Here’s one of Porky Pig demonstrating that white glove thing:
Here, Dean opens the door for Hogarth in The Iron Giant:
Even when cast in shadow, that hand shows up really nicely in contrast to his dark burgundy robe.
Speaking of Hogarth, here he is hanging out in Downtown Coolsville:
One hand is in clearly silhouetted by the dark background, and the other shows clearly in contrast with Hogarth’s dark shirt. Note how the two hands, each silhouetted in their own way, work together to read as a single pose.
In the uber-classic “What’s Opera, Doc?” we see Elmer Fudd, whose cuirass almost disappears into the background, but his hands are nice and readable as he plots to get dat wabbit:
The lesson here is that although you should always strive to craft your poses into a clear silhouette, be aware that sometimes "silhouette" can be a more complicated idea. Our eyes don’t see shapes, they see contrasts. Contrasts are what make the shapes.
Use those contrasts to create clear silhouettes and recognize when you can use them to create clear internal silhouettes and you’ll open up a whole new range of what you can communicate with a character’s pose.
Hey guys and gals,
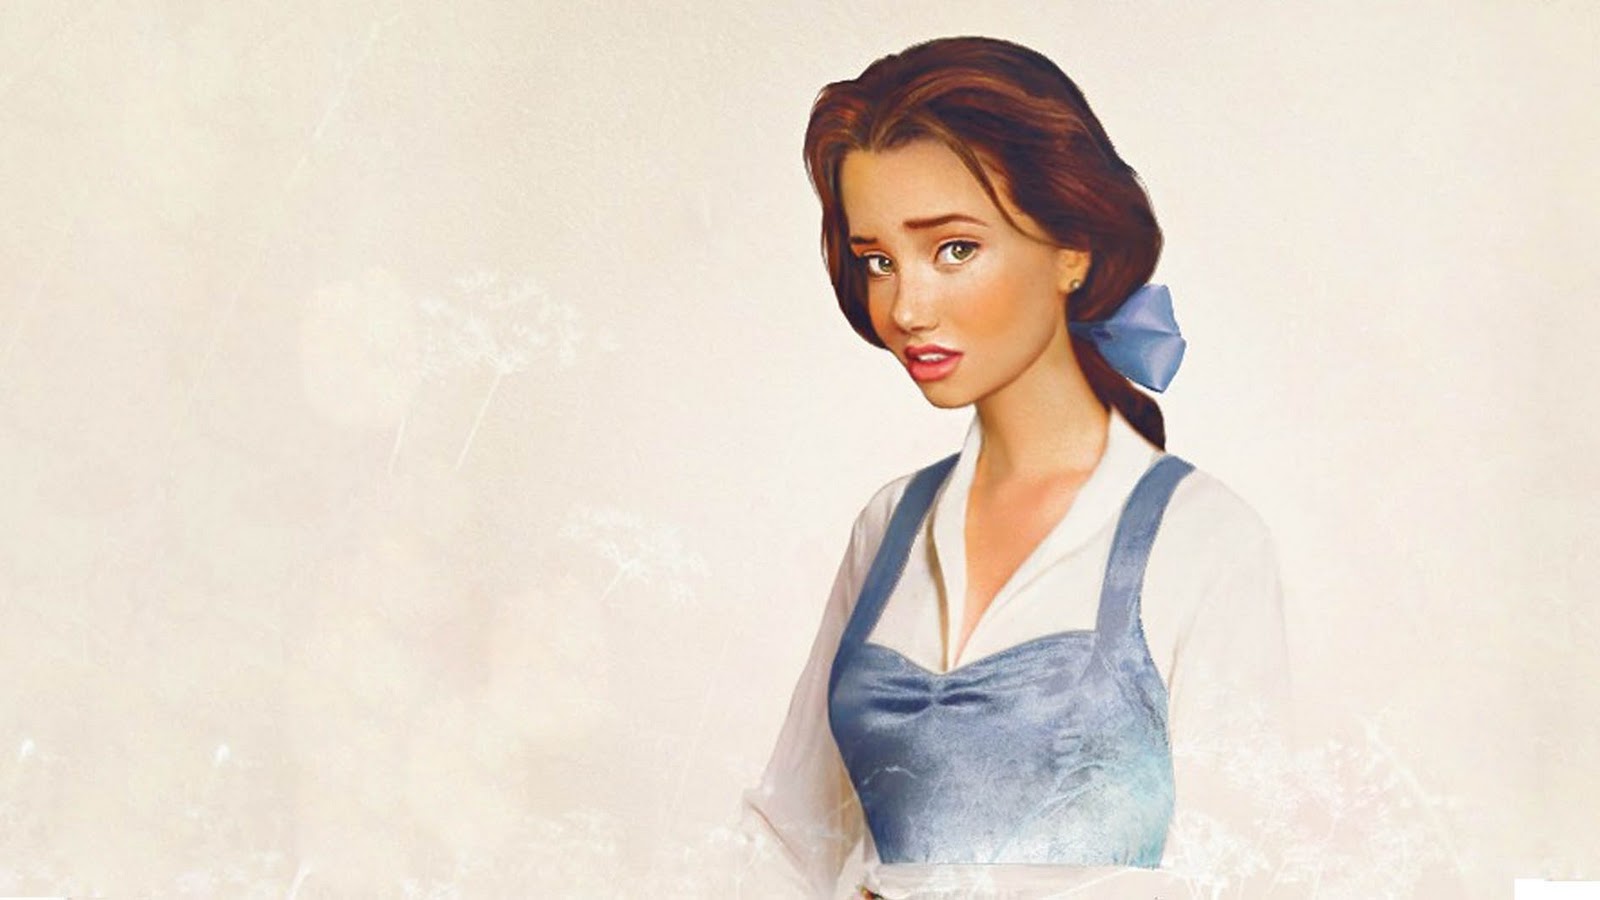
This post is not directly an animation resource, but instead a tribute to the beautiful work of Bournemouth student, Jirka Väätäinen. Using photoshop manipulation, Jirka has brung Disney's portfolio of females to real life. Each artwork seems to have captured the character perfectly. Beautiful work!
To view and enjoy, please click the pic.
Celebrating the festive season, here is the final mini-challenge of 2011.
The work was produced by Ohjin who presents the delight of receiving an unexpected present, while Sureshpadmaraj presents the frustration of trying to catch a runnerway!!
If you wish to leave any thoughts/constructive criticism about the work, please use the comments section.
Once more, from all at the 11SC Blog, hope you enjoy a Merry Christmas!
So, here in Sweden we celebrate Christmas on the 24th (we're about the only country to do that...). We also have a 50 year old tradition of watching a show from Disney at 3PM every Christmas. This is Serious Business, literally one third of Sweden (!!) sits down to watch this show. It includes some golden shorts, like this one:
As a child I LOVED this show. There's this feeling that Christmas doesn't really start until 3pm, when Benjamin invites us to go on a trip through old Disney moments with him. There's also the tradition we had that we opened gifts right after the show was done, but nevermind. ;)
Nowadays as an animator I have a new appreciation for the old Disney shorts. They are amazing! Just look at this one about a certain bull who likes to smell flowers...
So, even if it's a day early for the majority of you... (you shouldn't be at the computer on Christmas anyhow!)
From all of us, to all of you - Merry Christmas!!
(if there is anyone who wanna see the whole show, the first part can be found here!)
Hey guys and gals,
On this post I wish to link to a wonderful AnimSchool interview of Bobby Pontillas. Please click here to read.
Written by Andrew Tran, the interview discusses Bobby's journey from breaking into the industry to Blue Sky Studios, before transferring to work at Disney Studios.
You can also check out Bobby's personal blog by clicking here.
Hello guys and gals,
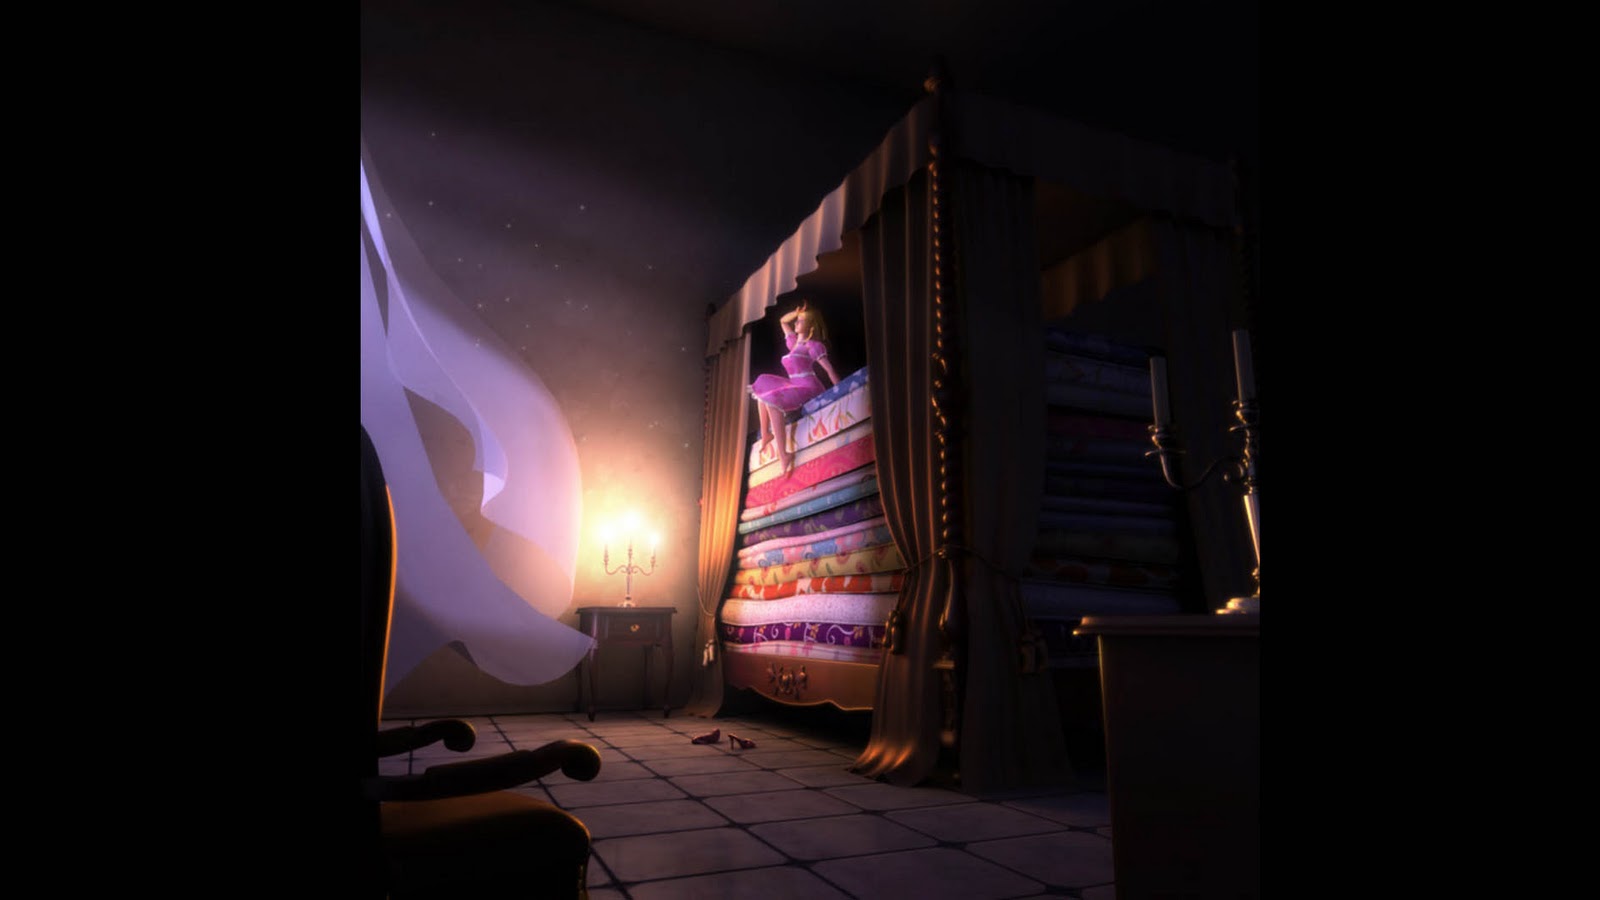
For those who wish to light and render like the pros, here is a beautiful website with many tutorials on how to approach a scene. Click the image to check it out!
(Many thanks to Iestyn Roberts for the link)
Hey guys and gals,
Understanding beats and timing can be a complicated subject to understand. Here's a great tutorial by Canadian animator, Amir Avni, on how to research and explore the topic, before implementing it into your own work.
Click the image to check it out! Also please don't forget to check out part two!
Hey guys and gals,
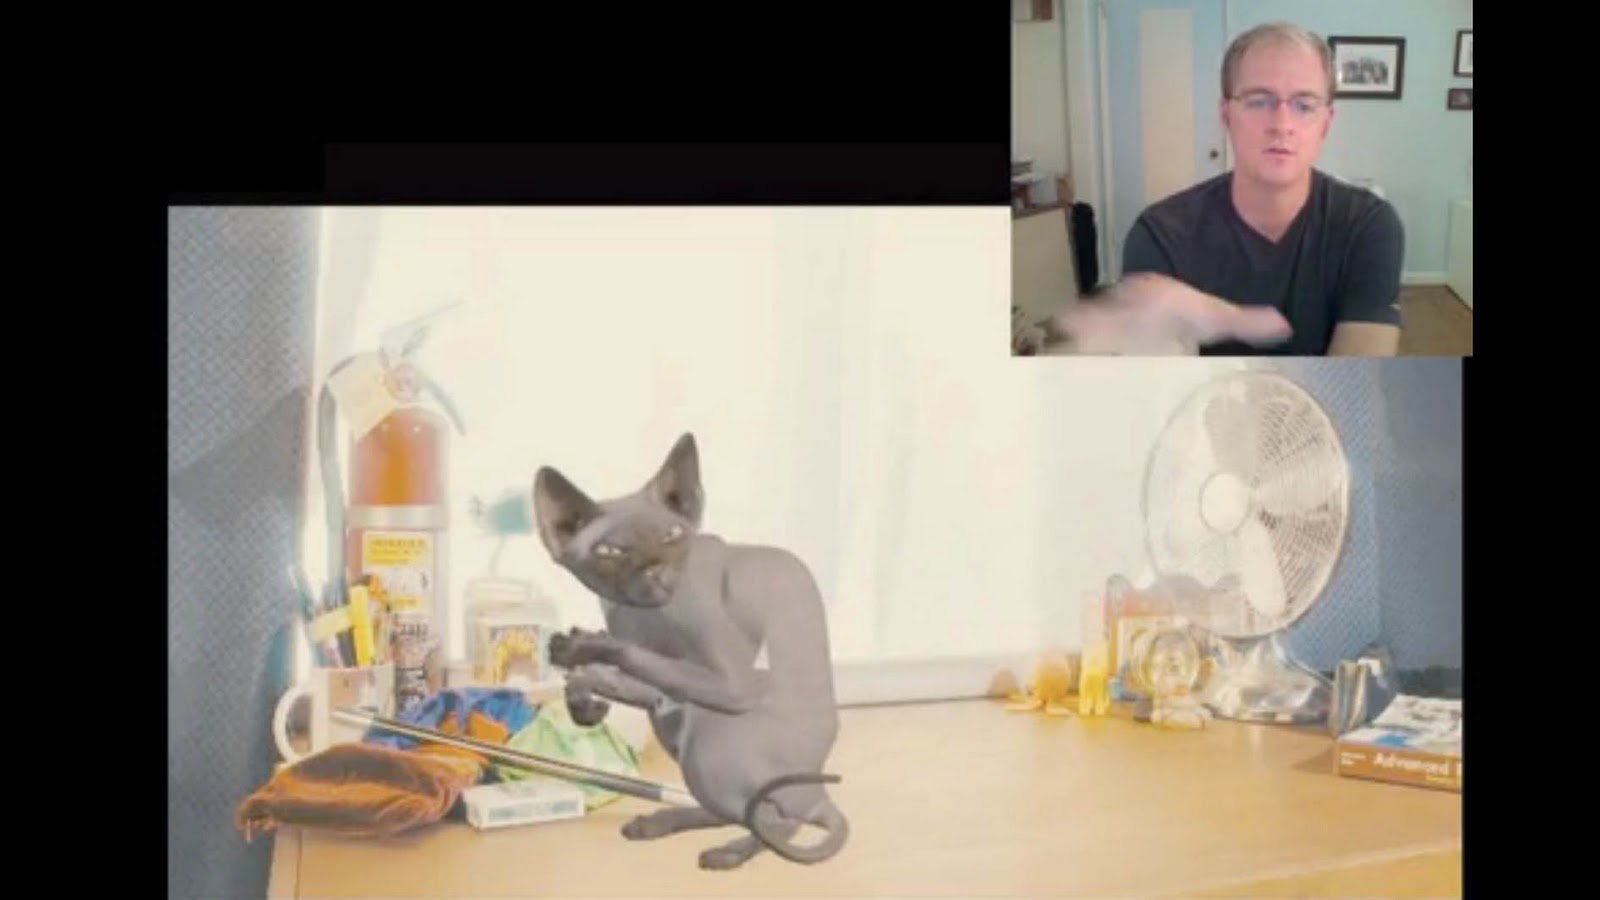
From time to time, you may have the opportunity to animate animals. This is particularly the case, should you hope to one day work for leading animation company, Tippett Studio.
Their supervising animation,William Groebe, presents a masterclass on creature animation. He also includes some great advice on what to include in your reel for a job at the studio.
The presentation is a long one, so please grab a cup of tea (possibly a cushion too), then sit back, learn and enjoy. Click the image to check it out!
(Our thanks to Marina Anthony for providing the link)
Hey everyone Jason Schleifer has done a great TEDX talk about developing character and the importance of giving back storys. I hope you enjoy this gem as much as I did.
Hello guys and gals,
This one is a double posting to catch up on what has happened in the last few weeks.
First up is J.K. Riki's entry for the circus challenge. Famous for his Fred the Monkey series, he treats us to some 2d animation. Please click here to see his set of thumbnails.
Second up is Mc 21: the pendulum. Great to see people try Cosmicfool's tutorial, which once again we wish to thank him for. There were a couple of people who took this on and added some nice creativity. Brian Horgon takes us back to the good old days with a tribute to Space Invaders.
Next, Sureshpadmaraj treast us to something a little different. A complex idea, that treats the pendulum as a gatekeeper. 'You shall not past!!!!!... ... ... ok, go on then'. Brilliant!
If you have gotten into a mental rut or just a feeling like giving up because your shots to hard head over to the great blog Animator Letters Project. They are building a collection of great letters to aspiring animators from animators all over. Right from the start they hit you with the best pep talks ever.
"Ultimately, the struggles that we have- the creative blocks we all face- come from comparing ourselves to others. I'm not as good as that person. I'm not as successful as that person. That person is at the level I want to be at and I don't have it in me to get there. I do this constantly. But I realized a few years ago that what I SHOULD be doing is comparing myself to myself." - Steve Anderson, Director of 'Winnie the Pooh'
"To all you who want to be animators..first and foremost, you must find and recognize the same desire to create. Not only for others but to create for yourself. To create for the primal need to just create. Don't create for the sole reason and purpose of entertainment: to make others laugh and cry. Create to appeal to yourself." -Daniel Gonzales III (PIXAR)
One thing I find that often plagues animators that are just starting out, besides forgetting to bathe cause they are animating too much, is composition. What is compositoin you say? Well lets go to the dictionary.
composition is the placement or arrangement of visual elements or ingredients in a work of art or a photograph, as distinct from the subject of a work. It can also be thought of as the organization of the elements of art according to the principles of art.
Well that was wordy and boring...so what does it mean & how does that apply to animation? Composition has to do with where characters/objects are on the screen, within the frame of the shot. Too often than not, I see animators import a couple of rigs, throw in a camera and start animating. But why is the camera there? Why are the characters standing where they are? What is the composition? Why am I asking all these questions? Thought and planning should go into your composition just like it does in your acting choices. When you go see a Pixar movie, they didn't just barf the characters & cameras onto the screen...at least..I hope they didn't. Lots of thought and time goes into where they should be in relation to each other & where the camera should be. Here are some tips, examples, & rules... don't worry there are images, cause reading text is boring.
Fill Your Frame - You don't want the viewer to have to squint to make out what they are looking at. If the character is the focus of your shot...make sure you can see them. Now, sometimes having a character small on screen can be used for dramatic effect, but if this character is talking or doing an important action, make sure we can see em
Rule of Thirds - The basic principle behind the rule of thirds is to imagine breaking an image down into thirds (both horizontally and vertically) You want to place your main points of interest at the intersections or along the lines. Now this is a rule...and if I've learned anything in my days, its that rules are meant to be broken. So don't think you have to follow this all the time. But its good to understand the rules, so if you do break them you can intelligently talk about why you did.
Mood - This is a big one, you can use the angle/position of your camera to help evoke an emotion or mood. If your character is happy or sad, using a camera to help tell this will only make your animation that much better.
Placing a camera at a low angle looking up makes the subject look more powerful/strong. Vice versa, looking down at a character makes them feel more weak/helpless.
Positioning the character off to the side can create the feeling of loneliness and isolation.
Pushing the camera close in on a character can create a more intimate feeling.
Lines - You can use lines to help lead the viewers eyes to important parts of the shot.
These are just some examples and ideas. I highly recommend that everyone who is interested in animating try and learn more about composition! Here's a link that has even more info, cause you don't want to listen to me carry on all day. Happy Animating!
Hello guys and gals,
This is the last mini-challenge of the year, starting back up on 2nd January. It's titled ''YOU make it feel like Christmas!''.
So, what should be expected? Well, thats down to you! It could be animating a somebody opening a present or it could be a toy soldier. It could be a snowman, father christmas or even an elf, like in this great animation by Daniel Asher Harman. Please click to watch!
There's also the opportunity to do something Tim Burton-ish and do a spooky Xmasy clip, inspired by Nightmare Before Christmas. Or another ghoulish delight is that of Jacob Marley, whose spirit is captured beautifully in the below screenshot used in Flooby Nooby's ''Line of Action'' tutorial.
Also, remember you don't have to use a full rig. It could be a festive pendulum or ball bounce.You could even use a short piece of dialogue. Everyone's christmas is different so its really up to you!
As always frame rate should be 24fps, and animation length should be about
100-125f. Deadline is 19th December. Remember to keep the animations family friendly and please check the ''How to
Participate'' section for more notes on submission requirements.
Hello guys and gals,
A community thread created by Blurframe has led to this link to some wonderful Autodesk interviews. The interviews, which were captured at Siggraph 2011, are a chat with some of the top professionals in the world of film and animation.
Included within is an interesting question to Animation Mentor co-founder, Carlos Baena about what makes a good mentor?
Hey guys, so a few of us had discussed the possibility of having an annual 24 hour animation challenge. The idea is we will start from a certain time in the day, everyone wanting to participate can meet on skype(most likely a Sunday).
From there the days assignment will be handed out. Everyone will have the same amount of frames, same shot, same everything to work with, and will have 24 hours to complete the piece. Time frame will always be around 2-3 seconds. From here we can all communicate via skype, our successes, our struggles, our workflow etc....
If ppl are having issues someone working on the same shot will be available to help.
From chatting on skype so far, myself and 3 others have expressed interest.
Anyone else who is interested in hopping on board please comment below and leave your skype name. We will set up a skype room with all interested animators and start the challenge on an appropriate date. Don't be afraid of not feeling skilled enough to join in. It's a great opportunity to experience first hand how others approach a scene, and get some really fast feedback, and of course to learn!
Hello guys and gals,
During the month of August, everybody at the 11 Second Club was Kung Fu fighting, animating as fast as lightning!!
Now, the 11SC blog can finally bring you an interview with the competiton's monthly winner, Pairatch Lertkajornwong! His animation on the Kung Fu chef was beautifully executed and introduced something unusual with use of slow-mo!
I wish to thank Pairatch for his time and I hope you all enjoy the interview. If you wish to leave any thoughts, please feel free to use the comments section of this post. Thank you!
Through martial arts, Bruce Lee spent his entire life searching for new ways to explore self expression. I believe his philosophies share a big relationship with animation. For each of first my next two questions, I wish to first share a Bruce Lee quote and then ask a question related to it.
The first quote:“Don't fear failure. — Not failure, but low aim, is the crime. In great attempts it is glorious even to fail.” How often do you experiment with new ideas at the expense of playing it safe?
I am an open-minded type of person. I love to try new things and keep myself open to everything and everybody. At work, I always try a new workflow that I have learned from another animator. When I see a cool shot that I like, I tend to find who produced it, asking questions about how to accomplish something similar.
I think since I have began learning animation, I have always known the importance of having a good workflow. I tried many, trying to find one is the most powerful for my needs. Examples include layering animation, pose to pose, 2D planing, Straight Ahead. I must admit I am yet to find what I believe to be the best. I have realised however, that many times that my animation can suffer from a poor choice in workflow hurt myself, yet I understand that each has its own style. Its a matter of chooosing the right one at the right time.
I still hope to learn from others as much as I can and remain hungry and ready for new things all the time.
(This old showreel shows the range and contrast in Pairatch's work. Also please feel free to visit his youtube channel, by clicking here)
Second quote: ''It has always been very easy for me to put on a show and be cocky, and be flooded with a cocky feeling and feel pretty cool and all that. I can make all kinds of phoney things. Blinded by it. Or I can show some really fancy movement. But to experience oneself honestly, not lying to oneself, and to express myself honestly, now that is very hard to do.'' There is a big difference between simply move a rig and acting, in order to create the illusion of life. Would you like to expand on this?
I want to reach the level where I'm able to give the life to character more than just make him move. Believe me, I try so hard to do that, but I'm just a little animator and have so many more things to learn and experiment with. I still have a long way to go to reach that level.
For me I think it's very fantastic thing that you can make a simple polygon character move, make him look alive and make him look like he is the one that has a heart and mind. That it can catch the audience's imagination. If the character can catch the audience and make the audience feel with our character, that's awesome. The fun part of animation is hearing feedback that your work is liked or that they are happy with what you have produced.
When you realized you wanted to get into animation, how did you go about learning?
I began by teaching myself. I watched animation a lot and tried often to make it look like what is on screen. You can say sometimes, I copied it. I tried to learn this way for a while, until I met Jinanavin (Keko). I then studied animation at his school.
After that my methods of learning changed. I started to learn traditional techniques such as keyposes, breakdown, slow-in and slowout. I learnt the way that a classical animator would work and was introduced to the workflows of some of the best animators. The best thing is Keko's school is like a center that Thai animator can come together and meet. That means we have the opportunity to exchange some of ideas and experience about animation from this place. This is where I really started to learn and now I'm taking a class at iAnimate school. It's super fun!!!
What sort of things do you really enjoy animating?
Actually I'm very new in this industry. So every type of shot is still exciting. I find inspiration in everything. I really want to try to learn a super-cartoonie style because it looks extremely fun and I think it can challenge me. I love the way that everything is exaggerated. I remember watching Cloudy with a chance of Meatball for the first time. I see the trailer on my friends computer that he wearing headphone so i dont hear any sound but that trailer make me laught out loud because how freaky that character move is super funny and unpredictable.
Please talk about your animation process.
Pairatch working out a pose
I separated the process into two parts. The first part is the dailogue part that I worked upon like nost animators do i.e. Blocking keypose/Breakdown/Spline/Polish.
In the second part I work on the beats of the action, and a big thing for me is the rhythm of the shot. I tried to find a good rhythm and how the action flows throughout the shot by taking reference material.
The way I look at reference is that it of course starts in normal speed. For this animation, my real life reference is super slow, because I can not act like Kungfu Chef. So I then go to edit it in After Effects to work out a good timing. I also rough thumbnail it and animate with simple box polygons in maya, to see how it work. Through this method I am just trying to find the rhythm, which would be defined further through blocking keyposes. When it all works together, the poses should tell you the beat and rhythm clearly.
I'm not strict to body mechanics in my video ref because I know it looks bad for me. I just want to find a good actions that are interesting and flow. I want to see a lot of motion in a short time. I tried testing this shot ten times in one day to get it right.
(note the original pose that throws the bowl with one hand. This was changed to strengthen the idea)
After I have finished blocking the movement and everything works the way I would like, I put in breakdowns and then spline it.
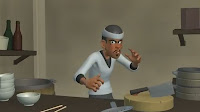
In Dragon: the Bruce Lee story, the young martial artist is working in a Chinese restaurant, when he becomes involved in a fight with some of the staff. Is this where the idea came from? If not, what else inspired the scene?
restuarant at Pairatch's house
The thing is my house is a restaurant, haha, which is the reason why when I heard this dialogue for the first time, I instantly started thinking about cooking. Through the idea I wanted to involve some object interacting, because I think interacting with a prop in your scene looks interesting. If you've seen my shot you will see a lot of interaction.
I tried to place the chef in some business like chopping some vegetables and then use the props and his placement in that environment to create a story.
I must ask the slow motion part. How did you plan out its timing? Also how did you keep control of composition with so many objects within the scene?
First I have to tell you that before I started working on this part, I had no idea about how I was going to make it look cool. My workflow for this was a kind of experiment. I tried to thumbnail and draw eveything. I also made the last composition first, which is the part that audience will see most see a lot first, before animating backwards to see how it worked.
I tried to tweak things as much as I could, because I felt when everything is set still at the start is of less importance to the audience and they wouldn't feel too much about it. The slowmotion part is where the entertainment happens, so this is where I spent the time. This workflow was good for me!!
Staging of the shot. Look how everything leads to the chef
Please talk about your use of different beats and rhythms.
Actually I thought about 3 speeds in my shot, but I wanted to make it super contrast. I have a normal speed, super slow speed and superfast speed. With the beat I thought about motion of the character first and then I animated the objects to this beat so everything will flow smoothly.
I tried to avoid action that would flow only forward then back, then forward the back, but instead break it up. This was one of the first thoughts when planning.
With so many other great winners choosing to render their 3d entries, was it a conscious choice to use limited lighting?
Actually I planned to spend one day for rendering, but I had a problem about the scene setting. I am also not that good at rendering so I wanted to choose something would could be made quick, but still look good. I asked friend who is good with rendering if there was a way that looked nice, but wasn't too complicated and the best answer is viewport 2.0 . I very happy with the result, you just put some light on your scene and it needs a couple of minite to render your work. That was awesome!!
Ken and Barbie
At the beginning of your eCritique, Dana Boadway Mason, mentions she was inspired to pursue a career in animation after watching the film, Toy Story. Dana liked the idea that an animator wasn't limited by their own body, but instead she could be any character. If you had the opportunity to animate any character from Toy Story, human or toy, who would you choose and why?
I actually want to animate the barbie couple, haha! They are super funny and make me laugh in every scene. I love the way they move. It is very unique and I think it looks easy but would be super hard to animate. Actually, I would love to animate any character in that movie. Just in case, Pixar hiring me, haha!
In your eCritique, Dana suggests pushing the chef's arcs and poses, while also squash and stretch in some areas of your clip. Please share your thoughts upon this.
Dana Boadway Mason's eCritique
Yes I totally agree with her suggestion. and you know what, I didn't think about it much when I was working on this piece. Maybe, because I just concentrate a lot on spacing and the amount of detail, so I didn't get an overall feeling. That's not good. Her suggestion helped me a lot and reminded me that I have to give an eye on the overall feeling of a shot before going deep into the detail.
Talk about any new concepts you were introduced to (or re-introduced to) through the eCritique.
One thing that stood out, that I remember and totally agree with Dana to pushing the chef's arcs and poses, while also applying some squash and stretch too. It was like wow !! Why did I forget that?
I always try to look into adding those little details like how he settles into this pose and also spacing. I always track some spacing and try to make every spacing look good, but the thing is, if you cannot make the overall feel of your work look right. the little details do not mean anything. This is because I believe the audience see the overall feeling is most important. I don't mean those little details are not important, but your first priority should be the overall feeling.
Is there anything you'd like to add about your thought-process or experience in August's competition?
I learned a lot from this piece, but the most important thing for each animator is to have calm when you working. Do not rush! For example, this shot, for me, is very complicated one and has a lot of things happening in a variety of technical ways: You have to concern yourself with how constraints, then there's IK/FK witching on the arms. You also have to manage the entertainment value of the shot.
The thing I would like to tell you is to be calm. Don't go to spline curve too fast if you not sure that its going to look good. If you go too fast you will work more slowly at the end. When you spline too early, you have to solve a lot of problems and make a lot of extra work. So I think concentrate on the each image and make sure that the frames will work well, before you get down to work on the graph editor.
What advice would you offer to someone who was just starting their animation education?
I think a good tip is to watch a lot of animation. It is very helpful. Actually watching any kind of movie is very useful, but try to pick the good ones. I think if you watch a lot your eye and your brain will remember a good thing from that movie, which will help make your natural sense for animation stronger. If your natural sense for animation is strong, then when you go to study animation, it can help lead to good things. For me, your eye is the most important thing. The better your eye and judgement, the more confident you will feel in achieving your desired result.
I just finished reading a book titled Writing Movies For Fun and Profit.
Its basically a realistic satire into what the film industry is looking for and how to make it as a writer. With that being said a lot of the wisdom's they offer to writers apply to animators.
So in point form here is some blunt food for thought for the young animators or job seekers out there.
1. Studios are only interested in making piles of money, period.
2. If you know what it is you want to do, and know where you want to work, research it. Live close to it. Tailor everything you do to it.
3. Discipline. This is what separates amateurs from professionals. ALWAYS BE ANIMATING. If you want to work in the industry and are presently not, you should feel compelled to animate everyday.
Why do you need to animate everyday?
1) Most of what you do won't be on your reel.
2) You will improve with everything you do.
3) Animating something becomes easier after you have done it once, imagine after 100 times. Seriously, animate a ball once. Time yourself. Save that scene. Do it 50 more times. Time yourself. Only compare the first and the last. I promise you, not only will the last one look better. It will have took you 1/10 the time.
4) You will have things to show a studio if they ask to see any of your work that is not on your reel, and it won't look like crap.
5)You won't still be in love with the shot that no one but you and your mom like, and you will be more inclined to throw it in the garbage and start something better, or you will be more inclined to take feedback and fix it.
4. Observe things everywhere. Life is one giant pose and character library. A good animator observes how ppl around them move, how they behave, how they hold themselves etc... If your not at home animating, you better be observing things that will help your animation.
5. This is the most important thing in this list. Everything you ever animate, ever, needs to be entertaining. If it's not, stop what you are doing, right away. Unless you are learning a principle, or its a school lesson, STOP NOW. Or unless you are entering some odd film competition, that 95 ppl out of 100 would want to punch you and the films watched in the face. STOP. If you don't know what's entertaining, or how to make a shot entertaining, STOP, ask everyone you know to look at your work and what you can do to inject entertainment into it. If you still don't know, STOP, watch every movie you can. If you still don't, STOP, rethink your career. All humans watch t.v, cartoons, movies and play video games with one purpose and only one purpose, TO BE ENTERTAINED.
6. Don't reinvent the wheel. No one wants you to. There are 12 principles of animation. Learn them, use them. If you are getting feedback and are always hearing ppl tell you that you're missing some of the principles. In all honesty, if you haven't mastered those principles stop doing advanced animation, you aren't ready.
7. Don't waste anyone's time(this goes for yourself as well). If you are seeking feedback to build a reel, and aren't applying what people are telling you, they will stop giving you feedback. This sounds harsh, but I've seen it happen many many times.
If your reel is still under construction, you should be devoting the majority of your waking time to it, any other time is wasted time. If you know what you are putting on your reel, you should seek feedback on every shot, until you know how to structure your reel to be as entertaining as possible. Fingers crossed ppl are still willing to help you at this stage.
If you are having someone watch your reel, they don't want to see 5 minutes of average work. We all know after 5 seconds if we want to watch your reel. If we aren't impressed at 10 we stop, if we are bored by 20 you've lost us. Think of it this way, two writers who have made 1.5 billion dollars for a studio only get 10 minutes to pitch a new script. How much time should an animator get to sell their reel?
Hey guys and gals,
Most budding animation enthusiasts have heard of Glen Keane. Not many have seen the beautiful work of his daughter Claire. Well here is a collection of Claire's artwork for the character of Rapunzel, posted together with the artwork from her father. Her use of line and colour are inspirational and in the words of Dapoon, this is ''Gold, gold, gold!!''
While, your visiting the post, please check out the rest of Living Lines Library, run by the talented animator Peter Nagy. The sites hosts lots of character model sheets, pencil tests and concept art, creating a wondeful tribute to the art of traditional animation.
Hey guys and gals,
This challenge was created to celebrate Halloween on the 31st October. The entries really capture the spirit!
The first entry is created by JKR. I loved the devilish antics of the ghost, that scared the bananas out of poor Fred. It is our first 2d entry in colour!! Second up, is a ghoulish entry by Arnold Balaka, followed by Guilherme Mello Oliveira. Really glad Guilherme's clip cut before the baby started crying.... Last up, and he cheated a bit due to time restraints, is a freakish take by Wolfor. However, warm congratulations, because it really is great animation!
Now to run out of here myself. If you have any thoughts on the work created, please place them in the comments section.
Now this next interview is pretty special to me. Sharing some words with us is Tim Allen, a leading stopmotion animator who has worked on many great features including Fantastic Mr Fox, Corpse Bride and Frankenweenie.
My first introduction to Tim's work was during a guest speech at UWE, Bristol. The university's senior lecturer, Chris Webster, had taught Tim many years before at Glamorgan University. They both spoke about the importance of having passion for being a character animator. I didn't quite understand their words at that time, yet somehow, listening to these people sparked a little flame inside of me. Since then, I have always known what I wanted to do as a career. My warm thanks to both.
To the rest of you, I hope you all enjoy the read!
How did you get into stop motion? When you first started animating, was it always your goal to work with puppets, or did your enthusiasm for stop motion come later?
As a kid I was always drawing cartoons & reading comics & I don’t think there was ever much question that I’d do anything other than some sort of artistic profession. Actually I’d never even considered I could do animation as a career until I was haphazardly looking at university courses. I’d committed myself to an art based profession studying a 2 year art BTEC in favour of the more academic A-level route. I didn’t know what to specialise in next & was sitting in the waiting room for the open day of a model making course when someone came in saying “Is anyone here for the animation degree?”. My eyes popped open at the idea I could make cartoons for a living! It sounds cheesy but from that moment I knew exactly what I wanted to do with my life. I visited every animation degree I could find until I saw that Glamorgan uni taught stop motion. That was it - animation with models. I’d found my calling.
With retrospect I think I was very lucky to find a career path that I passionately wanted to follow.
You graduated from Glamorgan College of Art, with a 2:2. To my understanding you struggled at first. Please may you talk about this experience, and what you believe turned your troubles around.
I was hit & miss at the start really. I made some successful work & some that the tutors couldn’t stand. At the humble age of 19 I was sophisticated enough to be highly amused by toilet humour. I crafted a film about a waste disposal system for the distant future, dubbed Toilet 2000. This ingenious device for the next millennium could remove body excretions without any need for unsightly straining from the user. Can you believe my tutors hated the film & at the critique ripped me apart in front of my fellow students. It didn’t help that the film wasn’t completely finished, though perhaps fortunate that it was only the sound effects missing.
I had actually worked incredibly hard on it & felt mortified. It made me utterly dedicated to prove myself on my future projects & create some of the best work in my year group. The story has a happy ending as I won the ‘Glammie’ for best 3rd year film with Kaptain KerPOW. I’m still proud of this if only that it was a personal victory to come back from feeling so shamed. The tutors remain good friends of mine & I’ve taught alongside them many times. One of them does enjoy jokingly reminding me of this fateful day whenever I’m giving a lecture to his students!
(Kaptain KerPOW! is the property of Glamorgan University, Wales)
Can you talk about the work you did once you graduated and how this prepared you for your role upon Corpse Bride.
At the time I left college the stop motion industry was having one of its occasional slumps in work, making jobs very hard to come by. I travelled all round the UK visiting every company I could find doing work experience & whatever I could get. This gave me a good understanding of what was out there but it took a year & a half to land my first animation job. The work was predominately children’s series back then & I’d travel to wherever a project was, in part just to keep employed. I actually loved working for many different companies, practising various techniques. Every time I did something new, I felt I was progressing & it was this feeling of learning new tricks & improving on my understanding of animation that was now my driving force.
I’d been animating professionally for 6 years & think I was becoming quite a flexible worker. At that time Corpse Bride was on the horizon as an upcoming project & seemed an unmissable chance for me to make much higher quality animation. However I sent 3 separate showreels before I even got an audition. By now I was very used to walking into a new studio environment & trying to mimic the animation style, but this was a real test – could I work at that quality level? I think my experience in adapting to new environments was what got me the job. Simply put, I asked the other animators what the director did & didn’t like & focused my audition accordingly. If there’s any key to how I got my first feature film, it’s those years of learning a broad range of approaches to animation on different projects.
What is like working for Tim Burton?
Well Tim’s only ever been lovely to me in the encounters we have & shows a lot of gratitude for the work we do. I don’t get much direct interaction with Tim as there’s an animation director as my main point of contact. He takes what Tim needs from the character & story & guides me on the best way to practically make that work in stop motion. Tim often likes the work to be dynamic & it’s not unusual for him to speed my work up by taking the odd frame out!
I’ve been lucky enough to have several surprise visits when he’s partially happy with a shot & he’s popped in just to tell me personally! You can’t help but feel flattered & a bit stunned! Our last conversation involved whether or not a vampire cat was more powerful than a Frankenstein dog. Guess you’ll have to watch the film to find out...
You worked on a wonderful and complex scene of Lord Barkis, giving a wedding speech that includes a small continuity error. In this shot, a camera tracks down a table of guests, each served a plate of chicken. For the next shot, Tim Burton requests the chicken is replaced to include the gag 'there is an eye in me soup'. The error is most often unnoticed while the gag adds to the entertainment value. As the animator of the shot, please may you share your thoughts on this change.
Lord Barkis's speech
Ha yes I forgot about that one! The soup joke was thought of either whilst I was doing the big table shot or just after, I forget exactly when. I did point out the continuity issue as soon as I heard about it, but they were already aware & felt the gag made it an acceptable compromise. The wedding speech shot was intended to be gray & dull in its uniformity. The identical chicken meals were intentionally mediocre & unappetising to emphasis the soullessness of this sham wedding. Also my animation of the guests was aimed to be apathetic to the event. It was felt that replacing Finnis’s chicken meal with soup for continuity reasons would spoil the uninspiring symmetry of the table layout. It could even be distracting from the story if the audience start wondering why only one person had a bowl of soup.
All the animators were given a prop from the film as a leaving present on completion of the film. Mine was a little tray complete with cutlery & plate of chicken!
"Mrs Everglot 'There's an eye in me soup'"
You now have the opportunity to work on Frankenweenie. Have you noticed differences in approach to animation style between the two features?
Frankenweenie is a bit snappier in its timing which makes it fun & less painstakingly controlled than Corpse Bride was. Yet I learnt great discipline from subtle movements & acting on Corpse. With Frankenweenie I’m doing much bolder, dynamic spacing, & the emphasis in getting the anatomy & use of weight right has been difficult but educational. It’s great to work with much more experienced animators than myself as I continue learning new approaches to animation. Frankenweenie has also given me the opportunity to work with 4 legged characters a lot!
The clearest change with Frankenweenie is that we have much less preparation time so it’s more hit & miss whether we get the shot exactly as intended. Ironically less preparation time slows the animation down so we work under a lot of pressure to minimise this. We all need to be faster yet get it right first time.
You also worked upon one of my favourite stop motion shorts, Susie Templeton's 'Peter and the Wolf'. I really loved the film for taking its own independent approach to the story. Please talk a bit about your thoughts on the film and your experience working upon it?
I’m very proud to have been a part of this film as not many people outside of Poland were involved in the shoot & it’s certainly a unique project. Suzie Templeton deserves so much credit for the film’s Oscar winning success & it was very tough to keep it as close as possible to her vision. It was actually a very hard film to work on. There were so many complications (time & money to mention but two!) that made it very difficult to give Suzie the shots she wanted.
Animating realistic acting to music was a fun challenge & also it was hard to get so much emotion out of puppets that had virtually no facial movement other than rotatable eyeballs! A big part of the experience was working in Łódź, Poland & soaking up the lifestyle. The Polish model making is simply beautiful & I really rate their attention to detail. Se-ma-For have a very long & interesting 60 year company history & had developed many of their own techniques that I haven’t seen anywhere else in Europe. It was a culture crossover with British production company Breakthru Films blending with mostly Polish workers & this made the experience very interesting for me. There were some inevitable clashes but it also broadened horizons for all. I for one had to learn to drink neat vodka!
I’ve since been back for a much longer stint to Łódź. I was animation supervisor on Breakthru film’s last project The Flying Machine directed by Martin Clapp which was an even more ambitious film than Peter & the Wolf. They have been the most gruelling two productions I’ve ever been a part of. It must have been worth it though - I’ve made many friends in Łódź & brought back my Polish girlfriend Monika!
(Please click pic to watch Trailer)
Please tell us about your animation process.
Every production is different, so my answer would be tweaked for each one. To generalise, my role is to make the best of the situation given & try to make the shot work in context with the film. In plain English, this usually means getting the shot started as quickly as possible, & animated to a tight deadline. Of course I must make sure it tells the story & keeps in character. The key is really in the preparation. Once I’m mid shot, most of the time I rely on my instincts. I try to take reference frames as a guide of the key frames to hit. If I’m luck I’ll get a chance to rehearse what does & doesn’t work for the shot. Occasionally for trickier physical shots I’ll do a live action video, commonly called a LAV (videoing myself in real time) to help give me a few practices at getting the anatomy & timing right.
Before tackling a shot, how much time is spent building an understanding with your character and puppet?
Well I’m afraid these days there’s never enough time! It can take many shots before you really understand the dos & don’ts with a character. Normally you are very lucky to get an animation test before using a new puppet. One of the best ways is to talk to animators who’ve had experience with the character to learn from their mistakes & follow what they’ve found successful.
If a directors confident with how you animate a character you may be with that character for most of the film. It’s easier than casting lots of different animators who’d all have a slightly different style. I look at my first shots with a particular puppet & often cringe because I can see how much better I’ve become with it over time.
What do you find most challenging?
Giving the director what they want in the time the producer allows – usually there just isn’t enough time to get it completely right.
Where do you find inspiration and influences?
I like to look at animators work & go through it frame by frame to study how they create certain movements. I often find myself thinking “Wow I wish I’d thought of doing it like that”. It’s great that we all have slightly different working techniques because you can keep learning from others.
If you had to choose any stop motion feature or short that you could have worked on, what film would you choose and why?
Jack Skellington, The Nightmare Before Xmas
The Nightmare Before Christmas. I was an art student when this hit the cinema & I just loved the visual style. I wrote my college essay on it (& got a pretty bad grade!) & it was the film that really made me think “I want to do this!”. Also it was the first of its kind in many ways as a big budget stop motion feature film which made the scale of the project pretty ground breaking. I’ve been lucky enough to work with quite a few of the Nightmare animators. I get a quiet buzz from that & have always enjoyed hearing their stories of life in Halloween Town.
One of the 'limitations'
of stop motion is that the physical elements have to stay still long
enough to capture them. An obvious challenge to this would be the
representation of water. Please talk a bit about how you have previously
tackled this?'
Clingfilm used in Fireman Sam
In stop motion we generally accept that we
can’t do photo realistic water. If you want that you need to go the
(generally more expensive) CG special effect route. But stop mo water
can have quite a stylistic charm & can be very convincing. Different
types of water use different techniques. For example, raindrops on a
window pane or watery/tearful eyes are normally glycerine. A single drop
of water for a close up is best represented as melted glass or even hot
glue from a glue gun. Water surfaces like puddles or lakes are usually
sheets of Perspex upon which other water effects can be animated. Cling
film is an easily recognisable stop motion water technique. It’s used
for larger bodies of moving water like waterfalls in Fantastic Mr Fox or
splashes in Fireman Sam. We wrapped it around wire for ‘tubes’ of water
projecting from Fireman Sam’s fire hose. To give clothes a wet look in
The Flying Machine I believe latex was painted into the fabric.
The
Wind in the Willows director told me that for the ‘Messing about on the
river’ sequence, the river itself was large quantities of wallpaper
paste that the boat could sink into slightly but remained on the surface
very convincingly. It released a toxic smell that filled the studio
& would never get passed health & safety by today’s standards!
Another stop motion favourite is KY jelly. It’s great for sweat running
down a puppets face or animated droplets of water running over a
surface. A traditional gag is to send a rookie runner out to buy 12
tubes of KY & see them return to the studio somewhat red faced!
( Tim's Fireman Sam water shot can be seen in his 2009 showreel)
Are there any exercises you can suggest to work on to prepare for character animation in stop motion?
Almost all animation should be considered ‘character animation’ as you need to believe that an inanimate object is ‘alive’! There’s a lot of tried & tested teaching techniques that I think make good building blocks for character work. Many animation courses use these techniques in a similar structure for a good reason - it generally works. For more novice students I’ve found it useful to separate performance into individual elements like simplistic lip sync, full facial lip sync & body mime language. Once students are getting to grips with each part it’s easier to put it together into a complete performance piece. That’s pretty standard practice though. I’d also suggest filming yourself or others a few times to get a range of ideas for how to approach the performance.
I do notice that there’s rarely animation classes focused purely on the eyes. These are the most important communication tool & there are so many tricks & tips in this vital area. I’ve given a few classes purely on eyes & found myself stunned at how many dos & don’ts there are. Even on Frankenweenie I’ve been learning new tricks to avoid being cross-eyed. The Tim Burton character designs are very prone to it & I still find it so easy to get the eyes looking in the wrong place.
A major problem stop motion students face is inexperience in how to make controllable puppets. How can you learn to animate a character if the puppet keeps falling down or the head is too heavy for the neck? When I teach I spend more time fixing puppets than going through animation techniques. This is a hard issue to solve as both puppet making & animation take lots of practice to learn & courses don’t have enough time available in the syllabus. I’d suggest buying a cheap armature for a start. If you use plasticine faces then mixing bees wax with the eye lids & eyebrows helps them maintain a firm edge & avoid going gloopy under the hot lights. There are so many more tricks like this, you need to pick it up one step at a time...
In your career to date, you have already enjoyed great success. Looking back at when you started animating, what advice would the Tim Allen of 2011 give to the Tim Allen of 1998?
Keep seeking to learn new techniques & improve. Try things outside of your comfort zone. Get out there, meet people in the industry & get to know their previous work. On a very practical note, when you’re earning, save for the quiet patches. Above all else, don’t forget to enjoy it – you bring dolls to life for a living!
Upon leaving this interview, I wish to leave you all with a glimpse at Tim Allen's 2011 showreel. Hope you all enjoy! If you have any thoughts on Tim's work, please share them in the comments section of this post. Thank you.
"Pose Book" is a great app I found via the Bancroft brothers that was developed by Stephen Silver. It is sadly available only on ipad, ipod touch and iphone so I can not try it out on my Android until it is available in the lion app store. I know that if Tony suggests it it is worth it. From the video on the site explaining the I am amazed at how in depth this is. If you get a chance to get it I'd love to hear your thoughts as well.
If you are not on ipods or ipads we have posted similar sites as well in these posts.
I had a body mechanics piece planned for this challenge, but its on hold till after xmas. Instead, this fortnight's challenge is written by Cosmicfool. Hoping it helps people who maybe struggling to find a good way to build a pendulum. Those who are familiar with this exercise, may have the freedom to be creative.
Hope you all enjoy!
Hey, this is another back to the basics challenge. As I was preparing this pendulum exercise, and talking to other animators. I was shocked to discover almost everyone I talked with had never done one before. You all know who you are. Now is your time to do one. Perhaps you'll learn a thing or two.
So the idea behind this challenge, is to take the pendulum and move it across the screen however you decide. Have each piece underneath it follow through, drag, and swing accordingly. You will be amazed at how many different ways you can do this, and how many ways this can apply to your animation! When we were brainstorming different things it could be, the list went on and on. A man on a zip line. A person carrying a bag of groceries. In harmony with last challenge it could be a man swinging on those rope things at a circus.Use your own imagination and think of ways you can apply this animation to really spice it up. I can promise all who participate will benefit in their animation from this one.So for those of you that are just learning animation, here's a loose step by step guide that I took to make this example piece. Hope it helps you out.
Step 1: Establishing your timing, and moving the board from point a to b.
Here I will show you how to use a timing chart to build a base for your pendulum. I have gone on to make changes afterwards, but it will give you a good result and a nice foundation to build upon.
So working in the front view, I'm going to move the board in translate x from a to b. First thing I do is I plan out my timing. I need an anticipation. I need to move across the screen. I need to ease in and to ease out of my movement.
To start, I set a key on frame 1.
I don't want my animation to start moving yet, I wish to allow the eye has a chance to see the screen. Therefore, I start my animation on frame 9.
I have a 7 frame anticipation to frame 16.
I have decided it will take twenty five frames to move across the screen, finishing at frame 41.
So as it sits, I have a key on 1, the same key on 9, my anticipation extreme on 16, my moving extreme on 41. I now need to really refine this movement, so I get a nice feel. To do this all my curves are in linear.
Placing first few keys: Click to enlarge
Timing chart
What I'm now going to work on is my spacing. To control my anticipation I added a key on frame 9 and basically pulled it up a bit, so I didn't move to fast when my movement starts. I found that was enough to give my anticipation a good feel.For my forward movement I used a timing chart that I'll show and explain.
Now the forward movement begins at frame 16. But for now, let's imagine it had started at frame 1. Here's the chart:
1--9--11--12--13--14--15--17--25
So here's how you read this chart:
(please note, 1 in this case represents Frame 16 on our pendulum)
1 is our point of origin. Frame 13 is our middle point. Frame 25 is our end point.
We need to separate the animation into two halves. We want to focus on getting from frame 1 to 13. We shall call this Part A. Part B will be from frame 13 to 25
So if you are looking at this you will think, 1-11 and 15-25 frames only accounts for 50% of the entire movement. Yup. They are creating my ease ins and outs. 9-11 is my acceleration. 15-17 is my starting to slow down
Now here's how I implement this chart using the graph editor (you could
use the dope sheet also, but I like using the graph editor as I can
polish my curves while I'm here).
Basically 1 is when I start moving forward from my anticipation. 25 is when I reach my end point.
At frame 13 I am half way through. If I was in linear, at frame 13 I would be half way through my movement. So I key frame 13. Up till this point I just had a key on 1 and 25.
Now I key frame 7 and 4. I know frame 7 is halfway from 1 and 13. Based on my chart, I want this key at 11.
I keyed 4 as well which I knew was the quarter way point. Based on my chart I wanted this key on frame 9.
So now the first half is correct. I than did the same on the back half of the movement. Frame 19 I moved to 15, and frame 22 I moved to 17.
Graph of timing chart
Once the timing chart has been transferred to the graph editor, it should look like the pic. Next, I merely polished up my handles. I also noticed I ended a bit faster then I wanted to, so I moved my last key over about 7 frames, to have a really subtle slow stop.
Step 2: Rotations
I needed a rotation on the big board to sell the anticipation. I needed one to show I was going to accelerate. I needed one to show I was going to stop.
I also needed a couple little subtle rotations at the end, to show the movement was coming to a halt. If you ever watch a car come to a stop at a light, you'll notice the body comes up and then down. The harder the stop, the bigger the recoil.
So heres I how I worked it all out: My body starts coming backwards at 9. So I decided to start the rotations at 10. My body starts accelerating at frame 16, so I figured to have the backwards rotation stop at 17, just so they didnt all settle same time. My biggest movements in forward progression was 26-30 so I decided to have it come its extreme at 31. At frame 35 my movement was starting its biggest slow down, so I decided to have its next extreme to show it was stopping hit at that frame. Then I just threw in a few keys to sell the stopping motion.
Platform graph: Click to enlarge
There really wasnt much to my breakdowns here, you can see in the graph the only ones of significance were when the board starts really accelerating, I just wanted to have it almost hit its extreme before the fast movement started, and than to slow into its big extreme. You'll see a few keys outside of that, but they are merely to prevent the board from being straight.Usually if I'm going to be passing the 0 point in rotations, to avoid things being straight and boring, I'll add a key before and after it, just so there is no boring pose in the movement.
Step 3: Now the fun part. Animating all those little guys underneath
So here's the fun part. This is where you really have a lot of room to play. How heavy do you want the chain to be? You can really start playing with the shapes you want that chain to make. If you look at my clip, my major poses were on frame 16, 24, 26, 36, and 41. The rest was just causing it to settle.
Frame 16
Frame 24
For frame 16, that was when my board hit its anticipation extreme. I wanted this pose to show that chain had some weight, so whatever it was pulling was resisting the momentum of the board. What was important here, was to get this pose, but not have the bottom of the chain pop. If that bottom of the ball rotates forward from its sitting pose, I have made a mistake.
Frame 24, I was still trying to maintain that same shape as 16, but show the momentum of the board going backward had started to effect that bottom chain.
Frame 26
Frame 36
Frame 26 is my reversal, and at this point, the board and momentum is winning, and that chain is gonna start following it. 36, is when that upper board really shows its slammed on the breaks, so I wanted to hit my biggest extreme here of the momentum of that chain coming through here.
Frame 41
Frame 41 is when that upper joint hits its first extreme of settling. So I really wanted that bottom joint to be at a nice contrast to it, and hold it back to show it was gonna get whipped by that upper joint that was being whipped by the board above it.
Basically the rest is just settling that weight. Here is the final graph and animation of my pendulum.
Final graph editor for translates and rotations
Its only a simple pendulum, but I hope it gives you something to build upon. Be creative and see what you can come up with. Good luck and happy animating!
Again the animation could be anywhere between 75-125 frames. If you have any questions about submission requirements, please check How-to-participate section for more details.